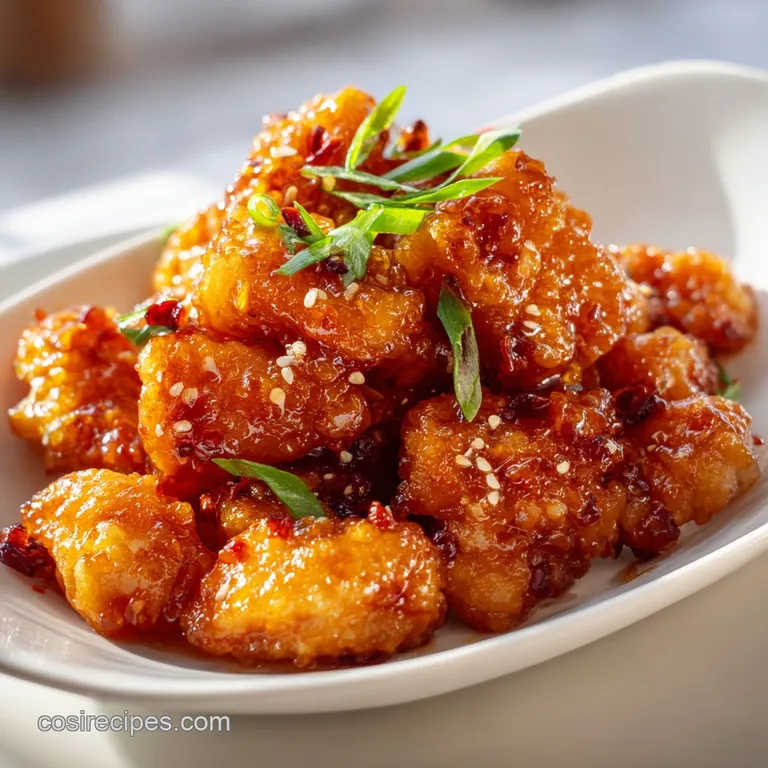
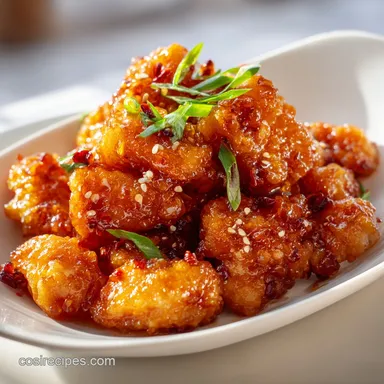
Baked Sweet and Sour Chicken: Crispy and Tangy

- Time: Active 20 minutes, Passive 35 minutes, Total 55 minutes
- Flavor/Texture Hook: Shatter crisp exterior with a velvety, tangy glaze
- Perfect for: Weekend family dinners and budget-friendly meal prep
- Create the Best Baked Sweet and Sour Chicken
- The Hidden Physics of Crispy Coating
- Performance Metrics and Preparation Guidelines
- Sourcing Budget Ingredients and Flavor Bases
- Essential Tools for Consistent Baking Results
- Master the Multi Phase Cooking Process
- Prevent Common Coating and Sauce Failures
- Smart Swaps for Dietary Needs
- Storing and Reviving Your Flavorful Leftovers
- Finishing Touches for Restaurant Quality Plating
- Recipe FAQs
- 📝 Recipe Card
Create the Best Baked Sweet and Sour Chicken
Friday nights at our house used to be defined by the crinkle of paper bags and the specific, metallic scent of lukewarm takeout containers. You know that feeling when you're craving something tangy and sticky, but by the time the delivery driver arrives, the chicken has turned into a soggy, sad version of its former self?
I spent months trying to replicate that specific addictive quality at home without the heavy grease or the high price tag. I wanted a version that stayed crunchy even after being tossed in a vibrant sauce, something that felt like a treat but used basic pantry staples like ketchup and vinegar.
The breakthrough happened when I realized that traditional frying isn't the only way to get a hard sear on meat. By using a very high oven temperature and a specific cornstarch egg-cornstarch sequence, we can mimic the texture of a deep fryer while staying within a budget.
This recipe is now my go to when I want to impress friends without spending three hours in the kitchen or twenty dollars on specialty ingredients. It’s about decoding those restaurant favorites and making them work for a normal Tuesday night.
Trust me, once you hear the shatter of the crust as you bite into the chicken, you'll never look at a takeout menu the same way again.
The Hidden Physics of Crispy Coating
Starch Dehydration: Cornstarch contains a higher percentage of amylose than all purpose flour, which creates a much more brittle and crisp structure when exposed to high heat. This results in that "shatter" effect we love in professional stir fry dishes.
Gastrique Balancing: The combination of apple cider vinegar and granulated sugar creates a simplified gastrique that thickens through evaporation rather than just starches. As the water in the vinegar cooks off, the sugar caramelizes, creating a velvety glaze that stays sticky rather than watery.
Surface Area Contact: Cutting the chicken into uniform 1 inch cubes increases the surface area for the sauce to cling to. Small cubes also ensure the meat cooks quickly enough that the interior stays juicy while the exterior has time to develop a golden brown crust.
Thermal Shock Searing: Starting with a 425°F oven provides the immediate heat needed to set the egg and cornstarch proteins. This "sear" prevents the coating from sliding off the chicken before it has a chance to firm up.
| Thickness | Internal Temp | Rest Time | Visual Cue |
|---|---|---|---|
| 1 inch cubes | 165°F (74°C) | 3 minutes | Opaque center, clear juices |
| 1.5 inch cubes | 165°F (74°C) | 5 minutes | Golden edges, firm touch |
| 0.5 inch strips | 165°F (74°C) | 2 minutes | Brittle crust, white meat |
The timing for this dish is precise because we are working with high heat. If you cut your chicken cubes too small, they might dry out before the peppers soften, so aim for that sweet spot of exactly one inch.
If you are ever in doubt about the doneness, a quick peek inside one of the larger chunks should reveal meat that is completely white and opaque without any traces of pink.
Performance Metrics and Preparation Guidelines
When you are trying to decide between the oven and the stovetop for this particular meal, the choice usually comes down to texture versus speed. While a wok is traditional, it requires constant attention and can be quite messy with oil splatter everywhere.
The oven method allows the chicken to develop a consistent crust on all sides simultaneously without you needing to stand over a hot flame.
| Method | Time | Texture | Best For |
|---|---|---|---|
| Oven Bake | 35 minutes | Uniformly crisp | Large batches, hands off |
| Stovetop Fry | 15 minutes | Extra crunchy | Single servings, quick fix |
| Air Fryer | 20 minutes | Very dry/crisp | Health focused, small portions |
Cooking this for a crowd is surprisingly simple because you can double the recipe and just use two baking sheets. If you find yourself in a rush, the stovetop method is faster for the initial browning, but you lose that concentrated flavor that comes from the sauce baking down in the oven.
For the best balance of effort and flavor, the oven is the clear winner for most home cooks.
Sourcing Budget Ingredients and Flavor Bases
| Component | Science Role | Pro Secret |
|---|---|---|
| Cornstarch | Moisture Barrier | Pat chicken dry first to help it stick |
| Apple Cider Vinegar | Acidic Tenderizer | It cuts the sugar's cloying sweetness |
| Pineapple Juice | Enzymatic Softener | Use canned juice for consistent acidity |
| Granulated Sugar | Caramelization Agent | It creates the "sticky" lacquer finish |
The ingredients in this dish are designed to be accessible. You likely already have ketchup and vinegar in the pantry, and those are the workhorses of the sauce. I've found that using low sodium soy sauce is a smart move here because the ketchup and sea salt already provide plenty of saltiness, and you don't want the final dish to be overwhelming.
For the chicken, we are using 1.5 lbs of boneless, skinless chicken breasts. You could substitute thighs if you prefer a juicier bite, but breasts work exceptionally well with this coating method. You'll also need 2 large eggs for the dredging station, and a full cup of cornstarch.
Don't be tempted to skimp on the cornstarch, as a thick coating is what protects the meat from the high heat of the oven.
The aromatics and bulk come from 1 red bell pepper, 1 green bell pepper, and half a white onion cut into petals. For that classic sweetness, we use 1 cup of fresh pineapple chunks and 1/2 cup of canned pineapple juice.
The sauce itself is a blend of 3/4 cup granulated sugar, 4 tablespoons of ketchup, 1/2 cup apple cider vinegar, 1 tablespoon of low sodium soy sauce, and 1 teaspoon of garlic powder.
Essential Tools for Consistent Baking Results
A large, rimmed baking sheet is non negotiable for this recipe. You need the edges to contain the sauce once we pour it over the chicken later in the process. If you use a flat cookie sheet, you'll end up with a sticky mess on the bottom of your oven.
I recommend a heavy gauge aluminum pan for the best heat distribution.
You will also need three shallow bowls to set up your dredging station. One bowl for the beaten eggs, one for the cornstarch mixture, and perhaps a third to hold the finished, coated chicken before it goes onto the pan.
A whisk is helpful for getting the eggs perfectly smooth, and a pair of tongs can keep your hands clean, though I usually find that the "one wet hand, one dry hand" method works best for coating.
Chef's Tip: Freeze your chicken for 15 minutes before cutting. This makes it much easier to get those perfect 1 inch cubes without the meat sliding around under your knife.
Finally, make sure you have a good quality spatula or a bench scraper. You'll need this to flip the chicken halfway through to ensure it doesn't stick to the pan. While the oil helps, the sugar in the sauce can become quite tacky, so a firm, thin spatula is your best friend for keeping those crispy bits intact.
Master the Multi Phase Cooking Process
- Preheat your oven to 425°F (220°C). Note: This high temperature is essential for creating the initial crust.
- Pat the chicken cubes completely dry with paper towels. Note: Excess moisture will cause the coating to steam and fall off.
- Whisk 2 large eggs in a shallow bowl until no streaks of yolk remain.
- Combine 1 cup cornstarch, 1/2 tsp sea salt, and 1/4 tsp black pepper in a second bowl.
- Dip each chicken cube into the egg, then roll in the cornstarch mixture until heavily coated.
- Drizzle 2 tablespoons of oil onto the baking sheet and spread it evenly.
- Place the coated chicken on the sheet in a single layer, ensuring they don't touch.
- Bake for 15 minutes until the coating is matte and firm to the touch.
- Remove the pan and scatter the peppers, onions, and pineapple around the chicken.
- Whisk the sugar, ketchup, vinegar, soy sauce, garlic powder, and juice, then pour over everything.
- Bake for another 20 minutes until the sauce is bubbling and thick.
During the final minutes of baking, the aroma in your kitchen will shift from sharp vinegar to a deep, caramelized sweetness. You are looking for the sauce to reduce by about a third, turning into a thick glaze that coats the back of a spoon.
If the peppers are tender crisp and the chicken looks glazed and shiny, you have hit the mark.
Prevent Common Coating and Sauce Failures
One of the most frustrating things that can happen is the coating sliding right off the chicken. This usually happens because the chicken was too wet before it hit the egg wash. If there is a layer of water on the meat, the egg can't "grab" the surface, and the whole crust will peel away like a wet band aid.
Always spend an extra minute with the paper towels to ensure a dry surface.
Another issue is the sauce burning on the edges of the pan. Because this sauce has a high sugar content, the areas where the sauce is thin will caramelize faster than the rest. To prevent this, make sure your vegetables and chicken are spread out but the sauce is concentrated in the center of the pan rather than smeared thinly toward the very edges.
Solving Coating Adhesion Issues
If your crust is falling off, it is likely a moisture problem. The starch needs a dry surface to bond with the proteins in the meat. If you are using frozen chicken that has been thawed, it will release more moisture than fresh chicken, so you might need to pat it dry several times during the prep process.
| Problem | Root Cause | Solution |
|---|---|---|
| Soggy Crust | Oven temp too low | Ensure preheat to full 425°F |
| Thin Sauce | Too much juice | Simmer sauce on stovetop first |
| Burnt Sugar | Pan is too large | Use a standard 13x18 rimmed sheet |
Adjusting Sauce Thickness
If you prefer a much thicker, almost jelly like sauce, you can whisk an extra teaspoon of cornstarch into the sauce mixture before pouring it over the chicken. However, be careful not to add too much, or the sauce will become cloudy and lose its vibrant red color.
The sugar naturally thickens the sauce as it bakes, so give it time to work its magic.
Managing Sugar Burn Risk
Since we are baking at a high temperature, the sugar in the ketchup and pineapple juice can go from caramelized to burnt in a matter of minutes. Keep a close eye on the dish during the last 5 minutes of cooking.
If the edges of the sauce start to look dark black rather than deep red, pull the pan out immediately.
- ✓ Always preheat your oven for at least 20 minutes to ensure a steady temperature.
- ✓ Use a neutral oil with a high smoke point, like canola or vegetable oil.
- ✓ Don't overcrowd the chicken; if the pieces touch, they will steam instead of crisp.
- ✓ Toss the chicken in the sauce halfway through the final bake for even glazing.
- ✓ Use fresh bell peppers for the best crunch; frozen ones will release too much water.
Smart Swaps for Dietary Needs
Adjusting this recipe for different needs is quite simple because the base components are very flexible. If you are looking for a baked cod recipe to serve alongside this for a multi protein feast, the tang of the lemon butter pairs beautifully with the sweet and sour notes here. For those watching their sugar intake, you can swap the granulated sugar for a brown sugar alternative, though you will lose some of that glass like shine on the glaze.
| Original Ingredient | Substitute | Why It Works |
|---|---|---|
| Granulated Sugar | Honey (1/2 cup) | Adds floral notes; caramelizes quickly |
| Apple Cider Vinegar | Rice Vinegar | Milder flavor; more traditional profile |
| Chicken Breast | Extra Firm Tofu | Absorbs sauce well. Note: Press tofu for 30 mins first |
If you need to make this gluten-free, the recipe is almost there already. Just ensure your soy sauce is replaced with tamari or coconut aminos, and double check that your cornstarch is certified gluten-free. The texture remains exactly the same, which is the beauty of using cornstarch as our primary breading agent.
Storing and Reviving Your Flavorful Leftovers
Leftovers can be kept in an airtight container in the refrigerator for up to 4 days. However, the one thing to keep in mind is that the crispy coating will naturally soften as it sits in the sauce. To revive the texture, avoid the microwave if possible.
Instead, spread the leftovers on a baking sheet and pop them into a 350°F (180°C) oven for about 10 minutes. This will re caramelize the sauce and help firm up the crust.
For zero waste cooking, don't throw away the pineapple skins or the pepper scraps. You can simmer the pineapple skins with a bit of ginger and water to make a refreshing tea. The pepper scraps can be diced finely and frozen for your next batch of morning omelets. If you have leftover sauce, it makes an incredible dip for homemade fries or even as a glaze for a traditional chicken pot pie crust if you're feeling adventurous with your flavor profiles.
Freezing this dish is possible, but I recommend freezing the coated, par baked chicken separately from the sauce. If you freeze them together, the chicken will become very soft. Freeze the chicken in a single layer on a tray before transferring to a bag, and store the sauce in a separate container.
When you're ready to eat, simply combine them and finish the final 20 minute bake in the oven.
Finishing Touches for Restaurant Quality Plating
Presentation is where you can really make this budget friendly meal look like a high end restaurant dish. I love serving this over a bed of fluffy white jasmine rice, making sure to spoon plenty of the thickened glaze over the top.
The contrast between the bright red sauce, the vibrant green peppers, and the pale rice is visually stunning.
Effective Garnish Selection
A sprinkle of toasted sesame seeds adds a tiny bit of crunch and a nutty aroma that rounds out the sweetness of the pineapple. Freshly sliced green onions are also a must; use the white parts for a sharp bite and the green parts for a pop of color.
If you like heat, a few thin slices of fresh red chili or a pinch of red pepper flakes can provide a beautiful "spark" to the finished plate.
Serving Large Group Portions
If you are serving this for a party, consider using a large, shallow wooden bowl. It keeps the heat in while allowing everyone to see the different textures of the dish. I like to keep a small bowl of extra sauce on the side for those who want their rice extra "saucy." Since this recipe scales up so easily, it's a fantastic option for potlucks or family reunions where you want something crowd pleasing but don't want to spend the whole evening in the kitchen.
Ultimately, the goal is to create a meal that feels special without the stress. By focusing on the texture of the chicken and the balance of the sauce, you've decoded one of the most popular takeout dishes in the world. It’s addictive, flavorful, and better than anything that comes in a cardboard box.
Enjoy the sizzle and the snap of that perfect crust!

Recipe FAQs
How to cook sweet and sour chicken in the oven?
Preheat your oven to 425°F (220°C) and coat your chicken cubes in a mixture of beaten eggs and seasoned cornstarch. Arrange the pieces in a single layer on an oiled baking sheet and bake for 35 minutes to set the crust before adding your sauce and vegetables to finish cooking.
Is there a secret ingredient for the most flavorful chicken?
The secret is the combination of pineapple juice and apple cider vinegar, which provides a perfect acidic balance to cut through the sweetness. If you enjoyed how this acid balances the heavy flavors, see how we use a similar acid technique to brighten up seafood dishes.
What is the secret to the best sweet and sour sauce?
Whisking together the pineapple juice, apple cider vinegar, ketchup, sugar, soy sauce, and garlic powder creates an authentic base. The key is ensuring these ingredients are fully emulsified before pouring them over the chicken to prevent separation during the baking process.
How do the Chinese get their chicken so tender?
They use a protective coating, such as the cornstarch and egg dredge used here, which acts as a physical barrier. This insulation prevents the high heat oven from drying out the breast meat, effectively steaming the chicken within its own crust.
Is it true I must fry the chicken before baking it?
No, this is a common misconception. By setting the cornstarch coating in a 425°F oven for 15 minutes first, you achieve a crispy, golden exterior without the need for deep frying.
How to keep the coating from getting soggy?
Pat the chicken cubes completely dry with paper towels before dipping them in egg. Excess moisture on the surface of the meat is the primary cause of a mushy breading, so start with a bone dry surface to ensure the cornstarch adheres firmly.
How to revive leftover sweet and sour chicken?
Spread the leftovers on a baking sheet and heat them in a 350°F oven for about 10 minutes. This method re-caramelizes the sauce and restores some of the crust's original crispiness, which microwaves simply cannot do.
Baked Sweet And Sour Chicken
Ingredients:
Instructions:
Nutrition Facts:
| Calories | 722 kcal |
|---|---|
| Protein | 56 g |
| Fat | 15.5 g |
| Carbs | 83 g |
| Fiber | 3 g |
| Sugar | 55 g |
| Sodium | 685 mg |
