Libby's Pumpkin Pie: Silky and Golden
- Time: Active 15 minutes, Passive 55 minutes, Total 70 minutes
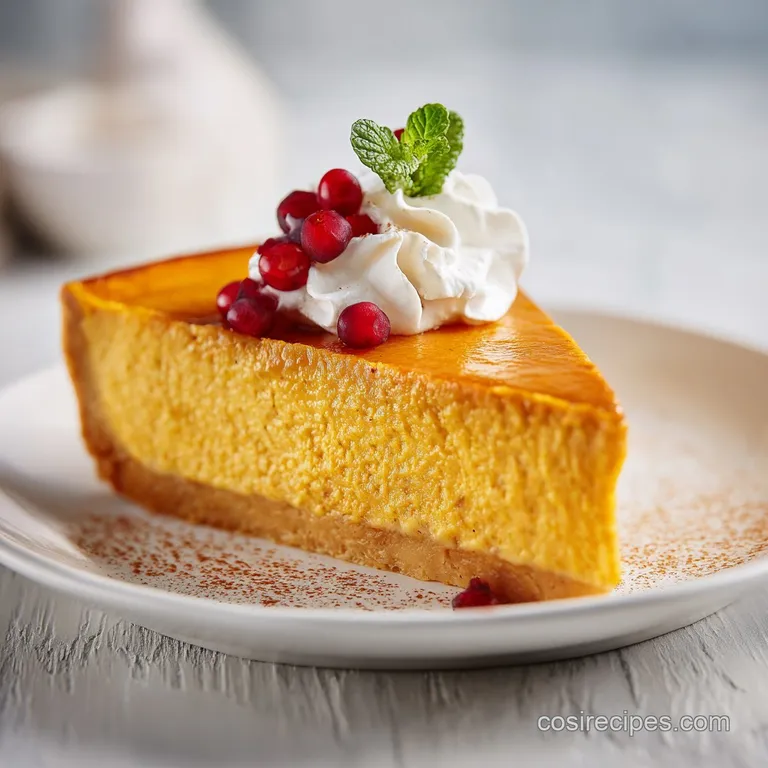
- Flavor/Texture Hook: Warmly spiced, creamy, and velvety with a shatter crisp crust
- Perfect for: Thanksgiving dinner, festive gatherings, or beginner friendly holiday baking
- Why the Iconic libbys pumpkin pie recipe Always Delivers
- Essential Stats for This Classic Thanksgiving Showstopper
- The Secret Elements Inside the Signature Custard Filling
- The Tools Required to Master This Holiday Masterpiece
- Transforming Simple Ingredients into a Velvety Dessert Masterpiece
- Common Challenges When Baking the Perfect Custard Filling
- Innovative Ways to Personalize Your Pumpkin Creation
- Keeping Your Festive Leftovers Fresh and Deliciously Moist
- The Perfect Accompaniments for a Truly Elegant Dessert Table
- Recipe FAQs
- 📝 Recipe Card
Why the Iconic libbys pumpkin pie recipe Always Delivers
The moment that first whiff of ground cloves and cinnamon hits the warm air of the kitchen, you know the holidays have officially arrived. There is something truly magic about the way the deep orange custard shimmers under the oven light as it sets.
I remember the first time I tried to go "fancy" with a fresh pumpkin I roasted myself, only to realize that the texture just wasn't the same. This libbys pumpkin pie recipe works because it relies on a consistency that only the classic canned puree provides, ensuring that every single slice is as elegant and smooth as the last.
We've all stood in the kitchen, peering through the oven glass, hoping the center doesn't crack like a canyon. That’s the beauty of sticking to a master method. It isn't just about mixing ingredients; it's about the ritual of whisking those eggs until they’re just right and smelling the spices bloom as they hit the sugar.
This isn't just a dessert; it’s a slice of nostalgia that brings everyone to the table, and honestly, the smell alone is enough to make any house feel like a home.
In this guide, we’re going to walk through the tiny details that turn a standard pie into a centerpiece. From the way we layer the spices to prevent clumping to the exact moment you need to turn down the heat, I’ll share the tricks I’ve learned from years of holiday baking.
We’re aiming for a custard that’s firm enough to hold its shape but soft enough to melt on your tongue, paired with a crust that provides a satisfying snap in every bite.
Essential Stats for This Classic Thanksgiving Showstopper
- Custard Coagulation
- The eggs and evaporated milk create a protein web that traps the pumpkin puree, turning liquid into a stable, sliceable solid.
- Thermal Momentum
- Starting at 425°F (218°C) for 15 minutes creates an immediate sear on the crust, preventing the dreaded "soggy bottom" before the custard sets.
- Molecular Dispersion
- Mixing the spices with the sugar first ensures that the tiny particles of cloves and ginger are separated, preventing spice "clumps" in the final pie.
- Evaporation Control
- Using evaporated milk instead of regular milk provides a higher concentration of milk solids and fat, which is what gives the pie its signature velvety mouthfeel.
| Method | Time | Texture | Best For |
|---|---|---|---|
| The Classic Bake | 70 minutes | Ultra velvety and dense | Traditional holiday dinners |
| The Blind Bake Method | 85 minutes | Extra crispy bottom crust | People who hate soft crusts |
| No Bake Pumpkin | 15 minutes | Light and mousse like | Quick summer treats or kids |
When we talk about the libbys pumpkin pie recipe, we are talking about a specific balance of moisture and fat. The evaporated milk is the secret weapon here; it has about 60% of the water removed, which means you're adding pure richness without making the filling too runny.
This is what allows the pie to set firmly while remaining incredibly creamy.
| Ingredient | Science Role | Pro Secret |
|---|---|---|
| Evaporated Milk | Emulsifier and fat source | Never swap for condensed milk; it’s too sweet and won't set correctly. |
| Large Eggs | Structural binder | Room temp eggs incorporate more smoothly into the heavy pumpkin puree. |
| Granulated Sugar | Hygroscopic sweetener | Whisk with spices first to prevent "cinnamon pockets" in the custard. |
| Libby's Pumpkin | Fiber and moisture | Use the 100% pure version, not the "pie mix" which already has sugar. |
The Secret Elements Inside the Signature Custard Filling
To make this classic Libby's pumpkin pie recipe, you need to be precise with your components. Each spice plays a specific role in building that deep, complex flavor profile we all crave.
- 0.75 cup (150g) granulated white sugar: Provides sweetness and helps the custard brown beautifully.
- 0.5 tsp (3g) fine sea salt: Sharpens the flavor of the pumpkin and spices.
- 0.5 tsp (1g) ground ginger: Adds a subtle heat that cuts through the richness of the milk.
- 0.25 tsp (0.5g) ground cloves: The heavy lifter for that "holiday" aroma.
- 1 tsp (2g) ground cinnamon: The warm, woody base of the spice blend.
- 2 large eggs (room temperature): These are the "glue" that holds the pie together.
- 15 oz (425g) Libby's 100% Pure Pumpkin: Pure, unseasoned pumpkin for the best texture.
- 12 fl oz (354ml) evaporated milk: Adds the fat and protein needed for a silky set.
- 1 9 inch deep dish pie shell (unbaked): A deep dish shell is vital to hold all that glorious filling.
| Original Ingredient | Substitute | Why It Works |
|---|---|---|
| Evaporated Milk | Heavy Cream | Adds more fat for an even richer, more decadent "restaurant style" pie. |
| White Sugar | Brown Sugar | Adds molasses notes; Note: Filling will be darker and slightly softer. |
| Ground Ginger | Fresh Grated Ginger | Adds a bright, zingy punch that feels very modern. |
If you find yourself with extra pumpkin puree after making this, don't let it go to waste! It's the perfect base for a homemade orange cake or even stirred into oatmeal for a festive breakfast. I’ve even seen people use the leftover spices to top their morning lattes.
The Tools Required to Master This Holiday Masterpiece
You don't need a high tech kitchen to master this pie recipe using Libby's pumpkin puree, but a few specific tools will make your life much easier. First and foremost, a large glass mixing bowl is your best friend. Glass allows you to see if any streaks of unmixed egg are hiding at the bottom.
You’ll also want a sturdy wire whisk—skip the electric mixer for this one, as we want to avoid whipping too much air into the custard, which can cause bubbles and cracks.
A heavy duty baking sheet is a non negotiable for me. Placing the pie shell on the sheet before you even pour the liquid in means you won't be wobbling a full, unbaked pie toward the oven, risking a "pumpkin tsunami" on your kitchen floor.
Finally,, a wire cooling rack is essential for airflow. If you cool the pie directly on the counter, the bottom of the tin stays hot for too long, which can lead to a soggy crust.
Chef's Tip: If you're worried about your crust edges browning too fast during that long bake, loosely wrap them in a ring of aluminum foil or use a silicone pie shield after the first 15 minutes. It keeps the edges golden while the center finishes setting.
Transforming Simple Ingredients into a Velvety Dessert Masterpiece
- Preheat and Prep: Set your oven to 425°F (218°C). In a small bowl, whisk together the sugar, salt, cinnamon, ginger, and cloves. Note: Mixing dry ingredients first prevents spice clumps in the liquid.
- Whisk the Foundation: In your large mixing bowl, beat the two room temperature eggs lightly. You want them broken up but not foamy.
- Integrate the Pumpkin: Stir the Libby's 100% Pure Pumpkin into the eggs. Follow this by adding your sugar spice mixture, stirring until the color is uniform and vibrant orange.
- Emulsify the Custard: Gradually pour in the 12 fl oz of evaporated milk. Whisk constantly but gently until the mixture is completely smooth and liquid.
- Fill the Shell: Place your 9 inch deep dish pie shell on a baking sheet. Carefully pour the custard into the shell, leaving about a quarter inch of space at the top.
- The over High heat Blast: Bake at 425°F (218°C) for exactly 15 minutes. Watch for the crust edges to start turning pale gold.
- The Gentle Finish: Lower the oven temperature to 350°F (177°C). Continue baking for 40 minutes until the edges are set but the center has a slight, Jell O-like wobble.
- The Knife Test: Insert a thin knife near the center; if it comes out clean, the pie is done. Total cook time should be 55 minutes.
- The Cooling Ritual: Transfer the pie to a wire rack. Let it sit undisturbed for 2 hours. Note: The pie continues to set as it cools; cutting too early results in a runny mess.
Level 1: Simple and Rustic
For a cozy family vibe, serve a generous slice with a massive dollop of hand whipped cream. Don't worry about being perfect; the contrast of the bright white cream against the deep orange pie is a classic for a reason. A simple sprinkle of extra cinnamon on top adds a nice touch without any fuss.
Level 2: Polished and Elegant
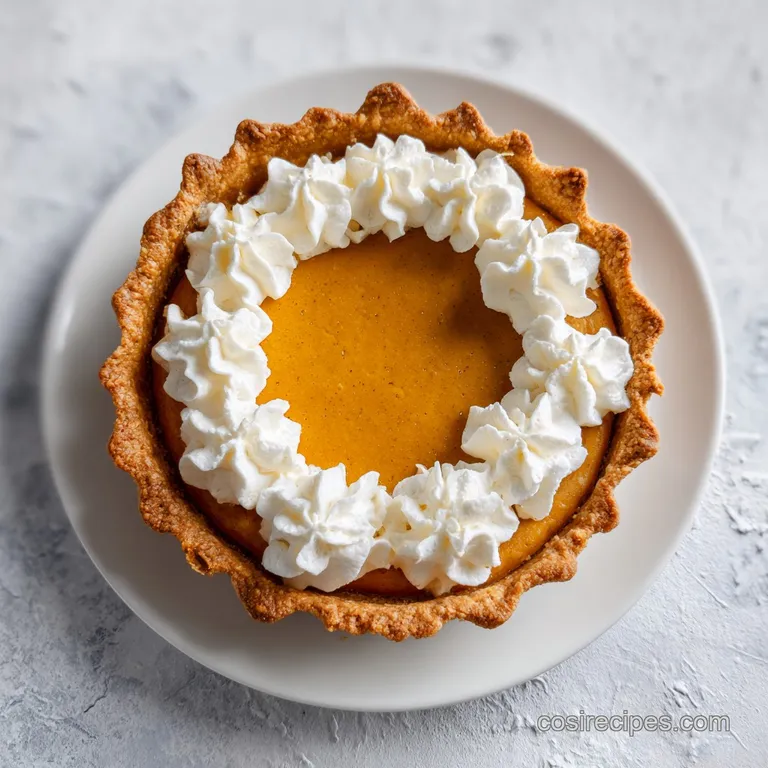
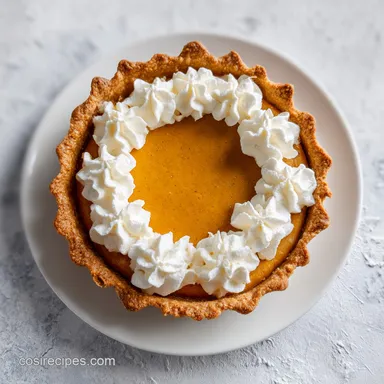
If you’re hosting a dinner party, use a star tip to pipe small mounds of whipped cream around the entire perimeter of the pie. Place a single whole pecan or a small shard of cinnamon stick on each mound. This covers any minor edge shrinkage and looks like it came from a high end bakery.
Level 3: The Restaurant Experience
To go full professional, serve the slice with a drizzle of bourbon infused maple syrup and a small pile of salted, toasted pepitas (pumpkin seeds) for crunch. You can even use a kitchen torch to lightly caramelize a thin layer of sugar on top of the slice, giving it a "pumpkin brûlée" finish that will leave your guests speechless.
| Plating Level | Main Garnish | Secret Touch |
|---|---|---|
| Simple | Whipped Cream | A pinch of nutmeg |
| Polished | Piped Rosettes | Dusting of cocoa powder |
| Restaurant | Candied Pepitas | Smoked sea salt |
Common Challenges When Baking the Perfect Custard Filling
One of the biggest heartbreaks is pulling a beautiful pie out only to see a giant crack form across the middle ten minutes later. This usually happens because the pie was overbaked. The residual heat in the custard will continue to cook the center even after it's out of the oven.
If the center is bulging or looks completely firm when you take it out, it’s likely overdone. You want that "wiggle" in the middle it’s the secret to a silky texture.
Another common issue with the easy Libby's pumpkin pie recipe is the "soggy bottom." This happens when the moisture from the pumpkin seeps into the raw dough before it has a chance to bake. That’s why we start at 425°F (218°C).
That initial blast of heat is designed to cook the bottom of the crust instantly, creating a barrier. If you're still having trouble, try moving your oven rack to the lowest position for the first 15 minutes of baking.
Why Did My Pie Crack in the Center?
Cracking is almost always a sign of overcooking or cooling too fast. When the egg proteins get too hot, they tighten up and squeeze out moisture, causing the structure to "snap." To prevent this, pull the pie when the center still looks slightly underdone.
Also, avoid placing the hot pie directly under a cold air vent or in a drafty spot, as the sudden temperature drop can cause the custard to contract too quickly.
Why Is My Crust Soggy on the Bottom?
A "wet" crust usually means the oven wasn't hot enough at the start or the filling was too cold. Ensure your oven is fully preheated for at least 20 minutes before the pie goes in. Using a metal pie tin instead of ceramic can also help, as metal conducts heat much faster to the bottom of the dough.
| Problem | Root Cause | Solution |
|---|---|---|
| Filling is Grainy | Eggs were over beaten | Whisk eggs lightly by hand; avoid using an electric mixer. |
| Weeping (Liquid on top) | Overbaking | Pull the pie earlier; the "jiggle" is your best friend. |
| Shrinking Crust | Dough wasn't rested | If using homemade dough, let it chill in the tin for 30 mins before filling. |
Common Mistakes Checklist:
- ✓ Never skip the over high heat start; it's what saves your crust from sogginess.
- ✓ Don't use "Pumpkin Pie Mix" by mistake it contains different ingredients.
- ✓ Avoid over mixing once you add the evaporated milk to prevent air bubbles.
- ✓ Let the pie cool completely at room temperature before refrigerating to prevent "sweating."
- ✓ Use a deep dish shell; a standard shell will overflow and make a mess.
Innovative Ways to Personalize Your Pumpkin Creation
If you're cooking for a crowd and need a Libby's pumpkin pie recipe for 2 pies, simply double everything but be careful with the spices. Spices don't always scale linearly; I usually suggest doubling the cinnamon and ginger but only using 1.5x the amount of cloves, as they can become overwhelming in large batches.
You'll also need to bake them on separate racks and rotate them halfway through the 350°F (177°C) stage to ensure even browning.
For those looking for a modern twist, try replacing the granulated sugar with maple syrup. The flavor is incredible, though you’ll need to bake it about 5-10 minutes longer since you're adding more liquid.
If you want a deeper, almost smoky flavor, a tablespoon of dark molasses added to the pumpkin puree works wonders. It makes the pie look darker and more "rustic," which I personally find quite masterfully elegant.
- 1. Oven Heat
- Verify with an oven thermometer that your "high start" is truly 425°F (218°C).
- 2. Internal Temp
- For a perfect set, the internal temperature of the custard should reach 175°F (80°C).
- 3. Cooling Time
- Do not move the pie to the fridge for at least 120 minutes (2 hours).
Decision Shortcut: If you want a crunchier crust, blind bake the shell for 10 minutes before adding filling. If you want a spicier kick, add 1/4 tsp of black pepper or a pinch of cardamom.
If you want a lighter texture, separate the eggs, whisk the whites to soft peaks, and fold them in last.
For another festive treat that uses similar warm spices, you might enjoy these cloud soft cinnamon rolls. They use that same "spice blooming" technique to make the filling pop, and they are the perfect companion for a holiday brunch.
Keeping Your Festive Leftovers Fresh and Deliciously Moist
One of the great myths of the kitchen is that pumpkin pie can sit out on the counter overnight like a fruit pie. Because this is a custard based pie (meaning it's full of eggs and milk), it absolutely must be refrigerated once it has cooled to room temperature.
If you leave it out, you risk the texture becoming rubbery and, more importantly, it's not food safe.
- Fridge
- Wrap the pie loosely in plastic wrap or foil once completely cool. it will stay fresh and delicious for up to 4 days.
- Freezer
- Yes, you can freeze this! Wrap the whole pie (or individual slices) in a double layer of plastic wrap and then a layer of heavy duty foil. It lasts for up to 2 months.
- Zero Waste
- If you have leftover filling that wouldn't fit in the shell, bake it in small greased ramekins alongside the pie. They make perfect "crustless" pumpkin puddings for a snack!
To reheat a frozen slice, let it thaw in the fridge overnight. Don't use the microwave, as it will turn the custard into a rubbery mess and make the crust soggy. A quick 10 minutes in a 300°F (150°C) oven will revive the crust's crunch without overcooking the filling.
The Perfect Accompaniments for a Truly Elegant Dessert Table
When it comes to serving your homemade Libby's pumpkin pie, balance is everything. Since the pie is rich, creamy, and heavily spiced, you want something bright or slightly acidic to cut through that weight.
A sharp, aged cheddar cheese on the side is a classic New England pairing that sounds strange until you try it the saltiness is unbelievable with the sweet pumpkin.
If you're going the traditional route, a hot cup of coffee or a spiced chai tea is the way to go. The tannins in the tea or the bitterness of the coffee cleanse the palate between every decadent bite.
For a cold option, a glass of cold sparkling cider provides a refreshing bubble that makes the whole dessert feel lighter. No matter how you serve it, this classic pie is the ultimate masterclass in holiday comfort, proving that sometimes, the old school recipes are exactly what we need.

Recipe FAQs
Did Libby's change their pumpkin pie recipe?
No, the core recipe remains consistent. The classic formula relies on the same specific ratio of 100% pure pumpkin, evaporated milk, and warming spices that have defined the standard for generations.
Is it better to use evaporated milk or sweetened condensed milk in pumpkin pie?
Use evaporated milk for the authentic result. Sweetened condensed milk contains added sugar, which will make your pie cloyingly sweet and alter the chemical set of the custard. If you enjoyed mastering the custard texture here, see how we use different thickening agents in our creamy casserole to understand how protein based liquids behave under heat.
How much evaporated milk for Libby's pumpkin pie?
Use exactly one 12-fluid ounce (354ml) can. This volume is critical to achieving the proper balance between the pumpkin puree and the egg structure for a smooth, velvety finish.
What are the ingredients in Libby pumpkin pie filling?
Combine 15 ounces of pumpkin puree, 12 fluid ounces of evaporated milk, and two large eggs. The dry ingredients include 0.75 cup sugar, 0.5 teaspoon salt, 1 teaspoon cinnamon, 0.5 teaspoon ginger, and 0.25 teaspoon cloves.
How to ensure the pie doesn't crack?
Bake at 425°F for the first 15 minutes to set the foundation, then drop to 350°F for the remaining 40 minutes. Using this two-stage temperature method prevents the custard from overcooking and pulling away from the edges.
Is it true I should use pumpkin pie spice instead of individual spices?
No, this is a common misconception. Using individual ground cinnamon, ginger, and cloves allows for better control over the spice profile and prevents the uneven distribution that often happens with pre-mixed blends.
How to know when the pumpkin pie is fully cooked?
Insert a knife near the center to check for doneness. If the knife comes out clean, the custard has set perfectly; if it remains wet, continue baking for a few additional minutes until the structure is firm.
Classic Libby S Pumpkin Pie
Ingredients:
Instructions:
Nutrition Facts:
| Calories | 299 calories |
|---|---|
| Protein | 6.7 g |
| Fat | 12.4 g |
| Carbs | 41.9 g |
| Fiber | 1.6 g |
| Sugar | 23.4 g |
| Sodium | 350 mg |
