Buttermilk Syrup: Velvety and Airy
- Time: Active 10 minutes, Passive 5 minutes, Total 15 minutes
- Flavor/Texture Hook: Velvety, buttery, and incredibly airy
- Perfect for: Holiday brunches, birthday breakfasts, or when you want to impress houseguests
- The Ultimate Recipe for Buttermilk Syrup
- Essential Recipe Specifications
- Ingredients You Will Need
- Necessary Kitchen Equipment
- Cooking the Perfect Syrup
- Preventing Common Kitchen Disasters
- Creative Recipe Variations
- Storage and Reheating Guide
- Beautiful Presentation Tips
- Truths About Syrup Science
- Recipe FAQs
- 📝 Recipe Card
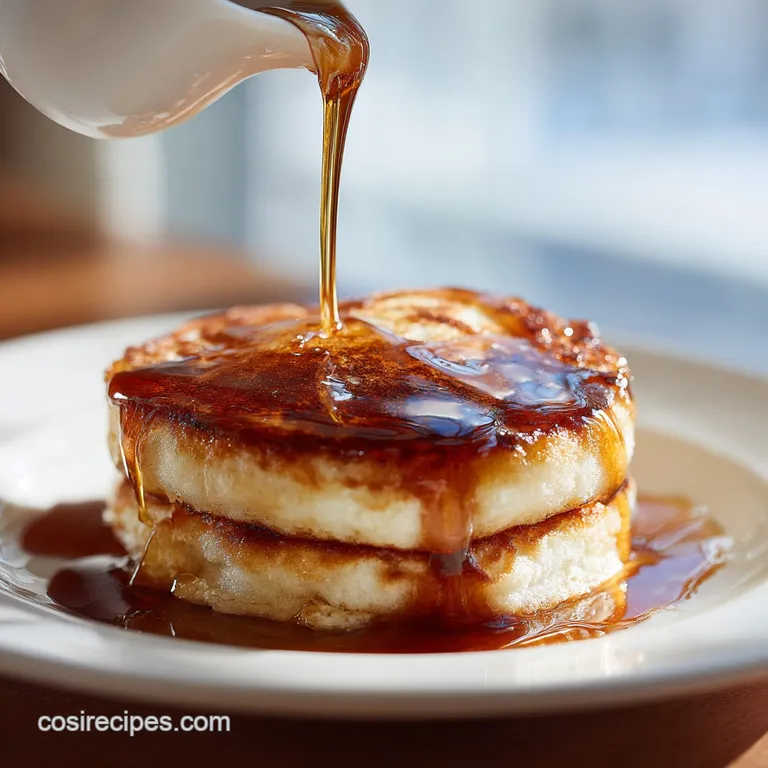
The Ultimate Recipe for Buttermilk Syrup
The first time I smelled this syrup bubbling on the stove, I knew my relationship with store-bought maple was over. There’s a specific, toasted sugar aroma that fills the kitchen, followed by a soft sizzle when the baking soda hits the pot.
It’s a sensory experience that feels like home, yet tastes like a five star restaurant. I remember my kids standing on their tiptoes, watching the pot "volcano" up with white foam, their eyes wide with excitement. It’s pure kitchen theater.
What makes this recipe truly special isn't just the sweetness, but the way it transforms from a simple amber liquid into a pale, frothy cloud. It has a velvety mouthfeel that you just can't get from a bottle.
Whether you’re pouring it over stacks of pancakes or using it as a dip for French toast sticks, it feels elegant and intentional. We’ve all had those mornings where breakfast feels like a chore, but whisking up a batch of this makes the whole house feel warm and inviting.
Trust me, once you see that golden liquid start to foam, you’ll understand why this is a master level staple. It’s surprisingly simple to pull off, but the results are nothing short of magic.
Let’s get into the science of why this works and how you can achieve that perfect, airy consistency every single time without making a mess of your stovetop.
Essential Recipe Specifications
The Physics of the Foam
Carbon Dioxide Expansion: The lactic acid in the buttermilk reacts instantly with the baking soda, creating millions of tiny CO2 bubbles. This aeration is what gives the syrup its signature "volcano" lift and fluffy, whipped texture.
Chef's Tip: Freeze your butter for 10 minutes then grate it into the pot; the smaller pieces melt more evenly with the sugar, preventing any chance of scorching before the emulsion forms.
| Method | Time | Texture | Best For |
|---|---|---|---|
| Stovetop | 15 minutes | Thick & Airy | Sunday Brunch |
| Microwave | 5 minutes | Thin & Sweet | Quick Fix |
| make-ahead | 20 minutes | Dense & Rich | Party Prep |
When choosing your method, consider the occasion. The stovetop allows for better sugar caramelization, resulting in a deeper, more complex flavor profile. The microwave is fine for a Tuesday morning, but you’ll lose that iconic toffee like depth that comes from controlled heat.
If you’re serving these over my Fluffy dairy-free recipe, the stovetop version provides the best structural support for the pancakes.
Ingredients You Will Need
Choosing high-quality components is the key to a master level finish. While you can use substitutes, the original list provides the most elegant balance of fat and acidity.
- 1/2 cup unsalted butter: Why this? Controls salt levels perfectly while providing the essential fat for a silky emulsion.
- 1 cup granulated white sugar: Why this? Dissolves cleanly to create a clear syrup base before the foaming agent is added.
- 1/2 cup full fat buttermilk: Why this? Provides the necessary acidity to trigger the baking soda reaction and adds tang.
- 1 tablespoon light corn syrup: Why this? Acts as an interfering agent to prevent the sugar from recrystallizing and getting gritty.
- 1 teaspoon baking soda: Why this? The "magic" ingredient that creates the airy, frothy texture we crave.
- 1 tablespoon pure vanilla extract: Why this? Adds a floral, aromatic depth that rounds out the heavy butter and sugar.
- 1 pinch fine sea salt: Why this? Brightens the sweetness and prevents the syrup from tasting one dimensional.
Necessary Kitchen Equipment
You don't need a professional kitchen, but a few specific tools make the process much safer and more successful. The most important thing is the size of your vessel.
| Component | Science Role | Pro Secret |
|---|---|---|
| Buttermilk | Acidic Catalyst | Room temp prevents the butter from seizing up |
| Baking Soda | Aeration Agent | Sift it first to avoid tiny bitter clumps |
| Corn Syrup | Crystal Inhibitor | Keeps the syrup smooth for days in the fridge |
Using a heavy bottomed saucepan is non negotiable here. Thin pots have "hot spots" that can cause the sugar to shatter or burn before it fully incorporates with the buttermilk. I prefer a 3 quart saucepan even though the liquid volume is small; you need that extra headspace for when the reaction occurs.
A silicone whisk is also better than a spoon because it incorporates air more efficiently during the final stage.
Cooking the Perfect Syrup

Stage 1: The Emulsion Phase
Combine the 1/2 cup unsalted butter, 1 cup granulated sugar, 1/2 cup buttermilk, 1 tablespoon light corn syrup, and the pinch of salt in your saucepan. Place over medium heat. Whisk gently as the butter melts to ensure the fat and water based buttermilk don't separate.
Stage 2: The Gentle Boil
Bring the mixture to a simmer. Cook for 7 minutes while whisking occasionally. You are looking for the sugar to be completely dissolved and the mixture to turn a very light amber color. Note: Do not let it reach a hard boil, or the milk solids might curdle.
Stage 3: The "Volcano" Finish
Remove the pot from the heat completely. Stir in the baking soda. The mixture will immediately begin to foam and triple in volume. Add the 1 tablespoon vanilla extract now. Whisk vigorously for 30 seconds until the foam is uniform and smells like toasted marshmallows.
Preventing Common Kitchen Disasters
To Prevent Stovetop Overflow
The biggest mistake people make with Buttermilk Syrup is using a pot that is too small. When that baking soda hits the hot liquid, it expands rapidly. If your pot is shallow, you'll have a sticky, sugary mess all over your burners. Always use a pot that looks three times too big for the initial liquid.
If the Syrup Separates
Sometimes the butter refuses to play nice with the buttermilk. This usually happens if the heat was too high too fast. If you see oily yellow streaks, don't panic. Remove it from the heat and whisk in a teaspoon of room temperature buttermilk.
The extra emulsifiers in the fresh buttermilk can often pull the sauce back together into a velvety consistency.
| Problem | Root Cause | Solution |
|---|---|---|
| Gritty Texture | Undissolved sugar | Simmer longer before adding the baking soda |
| Bitter Aftertaste | Clumped soda | Always sift or whisk soda into a powder first |
| Thin Consistency | Not enough reduction | Boil for an extra 2 minutes before foaming |
A common mistake I once made was adding the vanilla at the beginning. The heat destroys the delicate aromatics of the vanilla bean. By adding it at the very end during the "volcano" phase, you trap those scents inside the bubbles, making every bite an aromatic experience. You could even drizzle this over a warm slice of Betty Crocker Cherry recipe for a truly decadent dessert.
Common Mistakes Checklist
- ✓ Never leave the pot unattended during the boiling phase
- ✓ Use a saucepan with at least 3 inches of headspace
- ✓ Ensure your baking soda is fresh by testing a pinch in vinegar
- ✓ Sift the baking soda through a fine mesh strainer to avoid lumps
- ✓ Wait until the pot is off the heat before adding the vanilla
Creative Recipe Variations
Buttermilk Syrup Without Buttermilk
If you're craving this but the fridge is empty, you can make a "cheat" version. Mix 1/2 cup of whole milk with 1/2 tablespoon of lemon juice or white vinegar. Let it sit for 5 minutes until it looks slightly curdled.
It won't have the same thick "tang" as real buttermilk, but the acid will still trigger the baking soda for that iconic fizz.
Old Fashioned Buttermilk Maple Syrup
For a more traditional flavor, swap the light corn syrup for high-quality maple syrup. This changes the flavor profile from "caramel butter" to a rich, woodsy sweetness. Note: Maple syrup is less effective at preventing crystallization than corn syrup, so eat this version immediately while it's warm.
| Original Ingredient | Substitute | Why It Works |
|---|---|---|
| Full fat Buttermilk | Plain Greek Yogurt | Thinner consistency; provides similar acidity levels |
| Light Corn Syrup | Honey | Adds floral notes. Note: Makes syrup slightly stickier |
| Vanilla Extract | Bourbon | Adds a deep, oaky finish perfect for adults |
If you want a truly unique twist, try the "Bourbon Butter" variation. Replace half the vanilla with a splash of dark bourbon. The alcohol cooks off slightly in the residual heat, leaving behind a sophisticated flavor that pairs beautifully with toasted pecans.
It’s the kind of master level adjustment that makes people ask for the recipe.
Storage and Reheating Guide
Storing for Later
This syrup stores remarkably well in the refrigerator for up to 2 weeks. Store it in a glass jar with a tight fitting lid. You’ll notice that as it cools, the foam subsides and it turns into a thick, caramel like sauce. This is perfectly normal!
The flavor actually deepens as it sits, making it a great candidate for meal prep.
Reheating Techniques
To bring back that fluffy texture, you have to be gentle. Microwave the jar in 15 second intervals, stirring in between. Do not let it boil again, or the sauce might break. If you have the time, reheating it in a small pot over low heat while whisking constantly will help re incorporate some air, though it will never be quite as "foamy" as the moment it was made.
Zero Waste Tips
Don't wash that pot immediately! If you have leftover syrup sticking to the sides, pour in a little warm milk and whisk it around. It makes the most incredible "caramel steamer" drink for the kids.
If you have a larger amount of leftover syrup, use it as a glaze for roasted carrots or sweet potatoes the salt and butter in the syrup create a restaurant quality char.
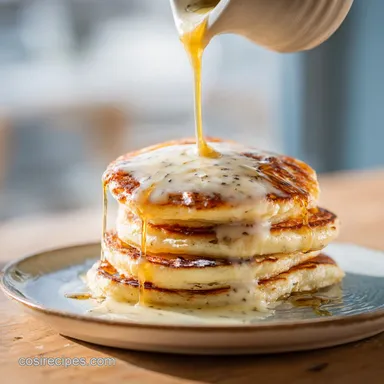
Beautiful Presentation Tips
For Restaurant Quality Plating
Instead of just pouring the syrup over the center of the stack, try the "drip and pool" method. Pour a generous amount into the center so it cascades down the sides, then add a small knob of salted butter right on top. The contrast between the pale, frothy syrup and the yellow butter is visually stunning.
The Soggy Proof Method
If you’re hosting a brunch, serve the syrup in a warmed ceramic pitcher on the side. This allows guests to control their own "syrup to pancake ratio" and prevents the bottom pancakes from getting soggy before everyone sits down.
For an extra touch of elegance, sprinkle a tiny pinch of flaky sea salt over the syrup once it’s on the plate to make the caramel notes pop.
For a fun twist, you can even serve this alongside Fried Green Tomatoes recipe if you like that sweet and salty southern vibe. The creamy syrup cuts through the acidity of the tomatoes beautifully. No matter how you serve it, the key is to keep it warm. A cold syrup on a hot pancake is a missed opportunity for that perfect, melting bite.
Truths About Syrup Science
Adding soda early won't help. If you add the baking soda at the start of the boil, the reaction will finish before you even get the pot off the stove. You’ll end up with a flat, dark syrup rather than the frothy masterpiece you're looking for. The timing of the "volcano" is everything.
The corn syrup is essential. Many people try to leave it out to be "healthier," but it serves a functional purpose. It prevents the sucrose molecules from bonding back together into crystals. Without it, your leftover syrup will turn into a gritty, sugary mess in the fridge by the next morning.
Color doesn't mean doneness. Because we add the baking soda at the end, the syrup will lighten significantly in color. Don't judge the flavor by the final pale look; the caramelization happens during that 7 minute simmer phase. Trust the timer and your nose, not just your eyes.

Recipe FAQs
How to make buttermilk syrup?
Combine butter, sugar, buttermilk, corn syrup, and salt in a pan over medium heat. Whisk until simmering, cook for 7 minutes until light amber, then remove from heat and vigorously whisk in baking soda and vanilla until foamy.
Can I make buttermilk syrup with regular milk?
No, you need the acid from buttermilk. You can simulate it by mixing 1/2 cup whole milk with 1/2 tablespoon of lemon juice or vinegar and letting it sit for five minutes to curdle.
How long does homemade buttermilk syrup last in the fridge?
Up to two weeks stored in an airtight glass jar. The foam will subside as it cools, turning into a thick caramel sauce, which is normal for storage.
What is the simple syrup formula?
The simple syrup base here uses 1 part sugar to 1 part liquid (water/buttermilk), plus an interfering agent like corn syrup. For this recipe, it’s 1 cup sugar to 1/2 cup buttermilk plus corn syrup for smoothness.
Is it true I must use a heavy bottomed saucepan?
Yes, this is critical for even heating. Thin pots create hot spots that can scorch the sugar before the buttermilk fully incorporates, leading to an uneven or gritty texture.
When should I add the vanilla extract?
Add the vanilla immediately after stirring in the baking soda. Adding it off the heat preserves its delicate aromatics, trapping the scent within the fresh foam.
What causes the signature foam when making buttermilk syrup?
The reaction between lactic acid in the buttermilk and the baking soda creates carbon dioxide gas. This aeration is what causes the rapid, voluminous expansion, creating the airy texture.
Easy Buttermilk Syrup Recipe
Ingredients:
Instructions:
Nutrition Facts:
| Calories | 110 kcal |
|---|---|
| Protein | 0.3 g |
| Fat | 6 g |
| Carbs | 14 g |
| Fiber | 0 g |
| Sugar | 14 g |
| Sodium | 124 mg |
