No Bake Chocolate Eclair Cake: Creamy and Decadent
- Time: Active 20 minutes, Passive 12 hours, Total 12 hours 20 minutes
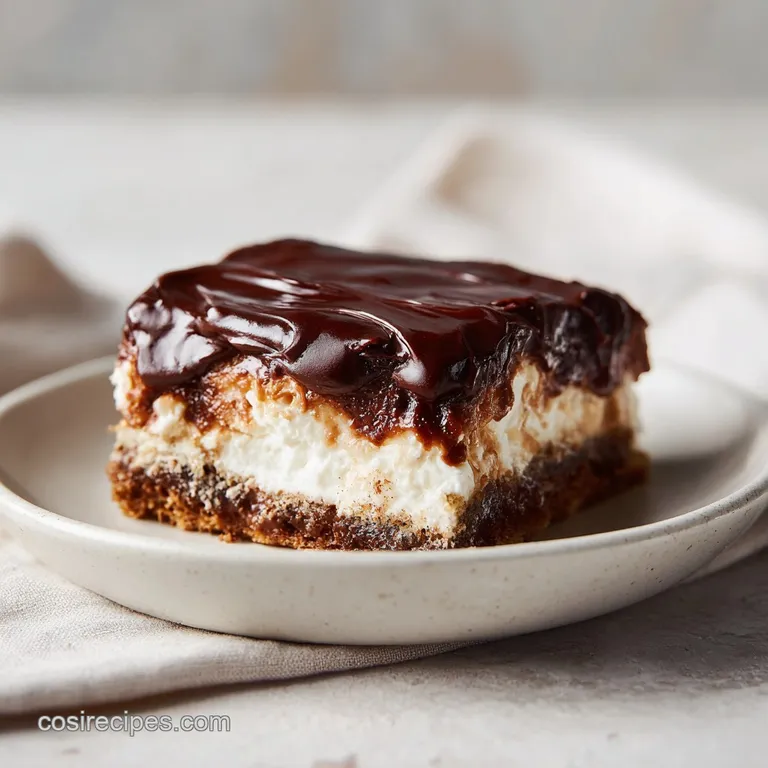
- Flavor/Texture Hook: Silky vanilla custard meets a soft, sponge like cracker base topped with a glossy, semi sweet chocolate snap.
- Perfect for: Large family gatherings, summer potlucks, and Make-ahead holiday entertaining.
- Creating the Perfect No Bake Chocolate Eclair Cake for Every Occasion
- Key Timing and Texture Specs for Your Best Batch
- Selecting the Best Elements for Your Custard and Glaze
- Tools You'll Need to Assemble This Elegant Icebox Treat
- Step by Step Guide from Assembly to the Long Chill
- How to Avoid Common Mistakes and Texture Troubles
- Simple Ways to Adapt This Dish for Dietary Needs
- Keeping Your Cake Fresh and Ready for Leftovers
- Beautiful Ways to Present and Serve Your Masterpiece
- Kitchen Myths and Logic Checks
- Recipe FAQs
- 📝 Recipe Card
Creating the Perfect No Bake Chocolate Eclair Cake for Every Occasion
There is a specific sound that happens when a sharp knife first breaks the surface of a chilled chocolate glaze. It’s a soft, satisfying crackle that gives way to a center so creamy it feels like silk on the tongue. I remember the first time I pulled this dish out of the fridge for a neighborhood block party.
The sun was beating down, and while everyone else brought heavy brownies or cookies that were melting in the heat, this cake sat there, cool and shimmering. People actually stopped talking when they took that first bite because the texture is so unexpected.
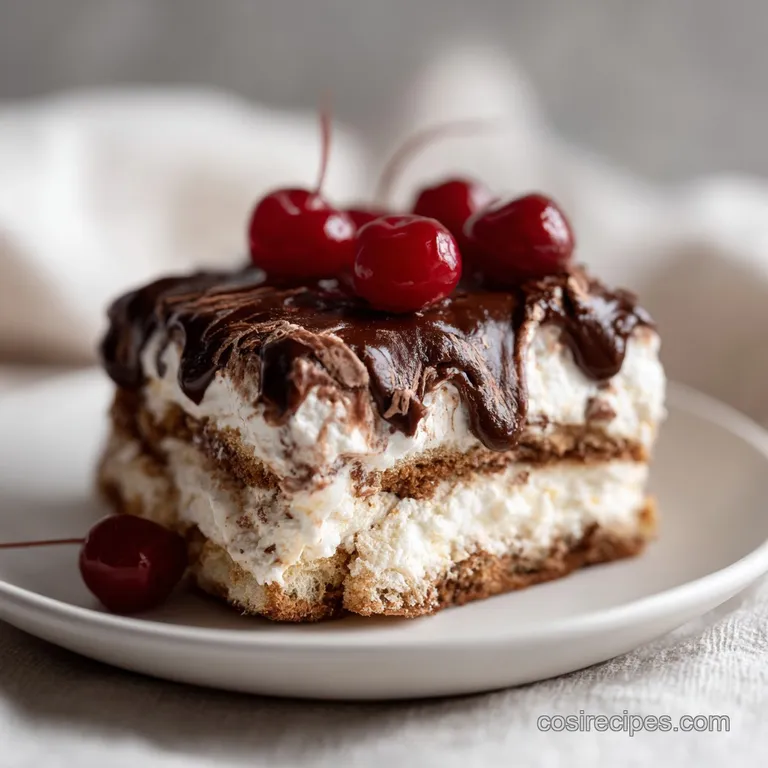
You see, the magic happens in the dark of the refrigerator. When you first layer those honey graham crackers, they are brittle and loud. But after they spend 12 hours submerged in a sea of vanilla bean custard, they undergo a total metamorphosis.
They absorb just enough moisture to lose their crunch, turning into something that mimics the light, airy layers of a traditional choux pastry. It is quite literally kitchen alchemy, and it's my favorite way to "bake" when I don't actually want to bake.
The secret to why this specific version works better than the ones you might find on the back of a box is the balance. Most versions are cloyingly sweet, but we’re using a few tricks like vanilla bean paste and a hit of Greek yogurt to give it depth.
It’s not just a sugar bomb; it’s an elegant dessert that feels refined. Trust me, once you see the way that glossy glaze settles over the top, you’ll be looking for any excuse to host a party just so you can make it again.
Key Timing and Texture Specs for Your Best Batch
The Hydration Window: The graham crackers require a minimum of 12 hours to absorb moisture from the pudding, which turns their brittle structure into a tender, cake like consistency.
Fat Induced Stability: Using 2% milk and full fat whipped topping provides enough saturated fat to ensure the layers stay distinct and don't collapse when sliced.
Acidic Balance: The addition of plain Greek yogurt introduces a subtle lactic acid that prevents the sugar in the pudding from overwhelming the palate, making the flavor more complex.
Thermal Shock Glaze: Pouring the warm glaze over the cold top layer of crackers creates a smooth, leveled surface that sets into a semi firm "snap" once chilled.
| Servings | Ingredient Adjustments | Pan Size | Chill Time |
|---|---|---|---|
| 6 People | Halve all ingredients (use 1 pudding pkg) | 8x8 inch square | 12 hours |
| 12 People | Standard recipe as listed | 9x13 inch glass | 12 hours |
| 24 People | Double all ingredients | Two 9x13 pans | 12-18 hours |
If you are planning a large event, I always suggest sticking to the 12 hour minimum for the chill time. While it might look ready after 6 hours, the center crackers will still have a lingering crunch that ruins the "eclair" illusion.
Consistency is everything when you are aiming for that Masterclass finish.
I've found that using a glass dish is non negotiable for the best visual impact. You want your guests to see those alternating layers of golden cracker and ivory cream through the side of the pan. It builds anticipation before the first slice is even served. If you're looking for something with a bit more fruit forward flair, this method of softening layers is very similar to how I handle my Apricot Cobbler recipe where texture is king.
Selecting the Best Elements for Your Custard and Glaze
| Component | Science Role | Pro Secret |
|---|---|---|
| Vanilla Bean Paste | Flavor Depth | The tiny black seeds provide a visual "gourmet" cue and a more intense, floral aroma than extract. |
| Greek Yogurt | Texture Stabilizer | The thickness of the yogurt prevents the pudding from becoming "weepy" as it sits in the fridge. |
| Dutch Process Cocoa | Color & Solubility | This cocoa is alkalized, meaning it dissolves faster in the glaze and provides a darker, more sophisticated chocolate hue. |
| Honey Graham Crackers | Structural Base | The honey adds a floral sweetness that complements the vanilla without needing extra added sugar. |
Selecting the right ingredients for your no bake chocolate eclair cake is the difference between a "potluck dish" and a "signature dessert."
- 2 packages (3.4 oz each) Instant Vanilla Pudding mix: Why this? Provides the immediate thickening needed to support the weight of the graham cracker layers.
- 2.5 cups cold 2% milk: Why this? The fat content offers a richer mouthfeel than skim while remaining fluid enough for hydration.
- 8 oz whipped topping, thawed: Why this? Incorporates air into the custard, making the final cake light and pillowy rather than dense.
- 0.5 cup plain non fat Greek yogurt: Why this? Adds body and a necessary tang to balance the sweetness of the instant pudding.
- 1 tsp pure vanilla bean paste: Why this? Elevates the flavor profile with concentrated vanilla bean specks throughout the cream.
- 14.4 oz honey graham crackers: Why this? These act as the "cake" layers, softening perfectly over the 12 hour rest period.
- 0.33 cup unsweetened Dutch process cocoa powder: Why this? Ensures a deep, dark chocolate finish for the glaze that isn't overly bitter.
- 1 cup granulated sugar: Why this? Sweetens the cocoa glaze and helps it achieve a glossy, syrup like consistency.
- 0.25 cup whole milk: Why this? Provides the liquid base for the chocolate glaze, ensuring it stays smooth as it boils.
- 0.5 cup unsalted butter: Why this? Adds fat for a shiny finish and helps the glaze set into a fudge like texture.
- 1 tsp vanilla extract: Why this? Rounds out the chocolate flavor in the glaze with a classic aromatic finish.
Tools You'll Need to Assemble This Elegant Icebox Treat
To get those clean, sharp edges that make this no bake chocolate eclair cake look professional, you need the right kit. A 9x13 inch glass baking dish is your best friend here. I prefer glass over ceramic because it conducts the cold more evenly, which is vital for the 12 hour set.
You’ll also want a sturdy whisk for the pudding don't skimp on the time here; the full 2 minutes of whisking is what activates the starches.
An offset spatula is another "pro" tool that I insist on. Using a regular butter knife or a spoon to spread the pudding and the glaze usually ends in a mess, with crackers being dragged around and the layers getting muddied.
An offset spatula allows you to glide over the surface with zero pressure, keeping the layers perfectly flat. Finally,, a medium heavy bottomed saucepan is essential for the glaze. Thin pans can lead to the sugar and cocoa scorching on the bottom, which will leave bitter black flecks in your beautiful chocolate finish.
step-by-step Guide from Assembly to the Long Chill
- Whisk both packages of instant vanilla pudding mix with 2.5 cups of cold 2% milk in a large bowl. Note: Do this for 2 full minutes until the mixture visibly thickens and holds a soft ribbon.
- Fold in 0.5 cup plain Greek yogurt and 1 tsp vanilla bean paste using a rubber spatula.
- Add 8 oz thawed whipped topping to the bowl and fold gently. Note: Stop as soon as the mixture is uniform and light; do not over mix or you'll lose the air.
- Place a single layer of honey graham crackers in the bottom of your 9x13 inch dish. Note: Snap the crackers into smaller pieces to fill every gap at the edges.
- Spread exactly half of the pudding mixture over the crackers using an offset spatula. Look for an even, flat layer.
- Layer more graham crackers directly on top of the pudding, followed by the remaining half of the custard.
- Top the final pudding layer with one last layer of graham crackers, pressing down very lightly to ensure contact.
- Whisk 0.33 cup cocoa powder, 1 cup sugar, and 0.25 cup whole milk in a saucepan over medium heat. Bring it to a rolling boil and cook for exactly 1 minute while stirring.
- Remove from heat and whisk in 0.5 cup unsalted butter and 1 tsp vanilla extract. Whisk until the glaze is glassy and mirror smooth.
- Pour the warm glaze over the top crackers immediately. Cover with plastic wrap (not touching the glaze) and refrigerate for 12 hours until the crackers have softened into a cake like texture.
How to Avoid Common Mistakes and Texture Troubles
The most common hurdle with a no bake chocolate eclair cake is the "sliding layer" syndrome. This happens when the pudding hasn't been whisked long enough to set, or the cake wasn't chilled for the full 12 hours.
If you cut into it too early, the crackers will still be hard, and the pudding will squish out the sides like a runaway train. Patience is your most important ingredient here.
Another thing to watch for is the glaze temperature. If you let the glaze sit in the pan too long after adding the butter, it will begin to set. If it’s too thick when you pour it, you won't get that perfectly flat, "poured on" look.
It should be warm enough to flow but not so hot that it melts the pudding layer underneath. Just a minute or two off the heat is usually the sweet spot.
Why Your Chocolate Glaze is Grainy
A grainy glaze usually comes down to the sugar not fully dissolving during the boiling stage. Ensure you are whisking constantly during that 1 minute of boiling. The Dutch process cocoa also helps here, as it's more soluble than natural cocoa powder.
If it still feels gritty, you likely didn't reach a high enough temperature.
Why the Cake is Soggy
While we want the crackers to be soft, "soggy" usually means too much liquid was added or the whipped topping was over folded until it turned back into a liquid. Stick strictly to the 2.5 cups of milk.
If you try to use more to make it "creamier," you'll end up with a dessert that requires a bowl and a spoon rather than a plate and a fork.
| Problem | Root Cause | Solution |
|---|---|---|
| Hard Crackers | Insufficient chill time | Wait the full 12 hours; do not rush the hydration. |
| Dull Glaze | Butter added too late | Whisk butter in immediately while cocoa mix is hot to emulsify. |
| Runny Pudding | Warm milk used | Use milk directly from the fridge to help the instant starch set. |
Common Mistakes Checklist
- ✓ Whisk the pudding for the full 120 seconds (set a timer!)
- ✓ Thaw the whipped topping completely in the fridge, never the microwave
- ✓ Use a heavy bottomed saucepan for the glaze to prevent scorching
- ✓ Leave a tiny gap between the plastic wrap and the glaze to avoid sticking
- ✓ Slice with a warm, damp knife for the cleanest presentation
Simple Ways to Adapt This Dish for Dietary Needs
If you are serving this no bake chocolate eclair cake homemade version to a crowd with specific needs, it’s surprisingly easy to pivot. For a gluten-free version, the most important swap is the crackers. There are several brands making gluten-free honey grahams now that work beautifully.
They tend to be a bit denser, so I actually recommend letting a gluten-free version sit for 18 hours instead of 12 to ensure they fully soften.
For a lower fat version, you can use fat free pudding and skim milk, though I have to warn you: the texture won't be as "master" level. The fats in the 2% milk and the butter in the glaze are what give this cake its luxurious mouthfeel.
If you need to skip the dairy, look for a coconut based whipped topping and a high-quality almond milk. Just be aware that the pudding might take a few minutes longer to set with nut milks.
| Original Ingredient | Substitute | Why It Works |
|---|---|---|
| Honey Graham Crackers | GF Graham Crackers | Provides the same structure without gluten. Note: Needs 6 extra hours of chill time. |
| 2% Cow Milk | Oat Milk (Extra Creamy) | Closest fat content to dairy; ensures the pudding sets properly. |
| Unsalted Butter | Coconut Oil (Refined) | Mimics the saturated fat needed for the glaze to set firmly. |
When you start playing with different flavors, you can really make this your own. I’ve seen people use chocolate graham crackers for a "double chocolate" version, or even swap the vanilla pudding for butterscotch. If you’re a fan of citrus, you might even consider how the bright notes of a Homemade Orange Cake could be translated here by adding orange zest to the custard layer.
Keeping Your Cake Fresh and Ready for Leftovers
Because this is a dairy heavy, moisture dependent dessert, storage is straightforward but specific. The cake must stay refrigerated. At room temperature, the whipped topping and pudding will begin to lose their structure within 30 minutes.
If you’re serving it at an outdoor event, keep the dish in a cooler or on a bed of ice until the very moment you are ready to slice it.
- Fridge: Store covered for up to 5 days. The crackers will continue to soften, and by day 4, it will be very tender (some people actually prefer it this way!).
- Freezer: You can freeze this cake! Wrap it tightly in a double layer of plastic wrap and then foil. It will last for up to 2 months.
- Thawing: Thaw in the refrigerator for 24 hours before serving. Do not thaw on the counter, or the glaze will weep.
Zero Waste Tip: If you have a few slices left that are looking a bit "messy" after serving, scoop them into parfait glasses! Layer the leftover cake with fresh berries or a sprinkle of crushed nuts.
It turns the leftovers into a whole new "presentation" archetype dessert that looks intentional rather than like "day old cake."
Beautiful Ways to Present and Serve Your Masterpiece
When you are ready to serve this easy no bake chocolate eclair cake, the way you cut it makes all the difference. I always keep a tall glass of hot water and a clean towel nearby. Dip your knife in the hot water, wipe it dry, and make one clean slice. Repeat this for every single cut.
This prevents the chocolate glaze from dragging down into the white custard, giving you those "masterclass" clean lines that show off the layers.
| Method | Time | Texture | Best For |
|---|---|---|---|
| Standard Fridge | 12 hours | Soft, cake like, creamy | Traditional dinner parties |
| Freezer Set | 4 hours | Firm, semi frozen, "ice cream" style | Hot summer outdoor parties |
| Quick Chill | 8 hours | Slightly firm center | Last minute guests (if necessary) |
If you want to go the extra mile, top each slice with a tiny dollop of extra whipped cream and a single fresh raspberry. The acidity of the fruit cuts through the richness of the chocolate and vanilla. You could also do a very light dusting of cocoa powder or even some shaved dark chocolate.
Just remember, this cake is already an "occasion ready" showstopper, so you don't need to overcomplicate the garnish.
Avoiding the Crust Crack
If you find your chocolate glaze is cracking when you slice it, it means the glaze set a bit too hard. To prevent this, let the cake sit on the counter for just 5 minutes before you start slicing.
This takes the "chill" off the butter in the glaze, making it more pliable and allowing the knife to glide through without shattering the top surface.
Perfect Portioning
For a 9x13 pan, I find that a 3x4 grid gives you 12 generous portions. If you’re serving this as part of a larger dessert spread, you can easily go to a 4x4 grid for 16 smaller "tasting" squares. Because it is so rich and velvety, a smaller portion is often exactly what people want after a big meal.
Kitchen Myths and Logic Checks
One of the biggest myths in the icebox dessert world is that "more time is always better." While 12 to 24 hours is the sweet spot for the classic chocolate eclair cake, going past 48 hours can actually be detrimental.
At that point, the crackers can become too hydrated, losing their distinct layer identity and turning into a singular, mushy mass. You want "cake texture," not "pudding texture."
Another common misconception is that you can't use homemade pudding. While you can, the starch structure of cooked pudding is different from instant. Instant pudding relies on modified food starch that sets without heat, which is why it stays so stable when mixed with whipped topping.
If you use a cooked custard, you must let it cool completely to room temperature before folding in the whipped topping, or you will melt the air bubbles and end up with a liquid mess.
Stick to the instant for this specific recipe it’s one of those rare times where the shortcut is actually the superior method for the desired result!

Recipe FAQs
What is no bake éclair cake?
It is a refrigerator based dessert that transforms crackers into a cake like texture. By layering graham crackers with a thick pudding yogurt mixture and chilling for 12 to 24 hours, the moisture from the filling softens the crackers, mimicking the texture of traditional pastry.
What are the ingredients for chocolate eclair cake?
You need instant vanilla pudding mix, 2% milk, whipped topping, plain non-fat Greek yogurt, and vanilla bean paste. The structure relies on honey graham crackers, while the topping requires unsweetened Dutch process cocoa powder, granulated sugar, whole milk, unsalted butter, and vanilla extract.
What are some common éclair cake mistakes?
Over mixing the whipped topping is the most frequent error. If you stir too aggressively after adding the topping, you deflate the air, resulting in a dense, heavy layer instead of a light, fluffy filling.
Is it true I must bake the crackers to get a crispy texture?
No, this is a common misconception. The secret to this cake is the hydration process; you must refrigerate for at least 12 hours so the crackers absorb moisture to reach their signature tender, cake like consistency.
How to ensure the pudding mixture thickens properly?
Whisk the instant pudding and 2% milk for two full minutes. You are looking for the point where the mixture visibly thickens and holds a soft ribbon on the whisk; if you stop early, the filling will be too runny to support the layers.
How to achieve a perfectly smooth chocolate glaze?
Boil the cocoa, sugar, and whole milk for exactly one minute before removing from heat. Whisking the butter and vanilla into the hot mixture immediately creates a stable, glossy emulsion; if you enjoyed this technique of creating a smooth finish, see how we use similar fat-balancing logic in our Almond Joy Cookie Bars.
How to layer the cake for the best structure?
Place a single, solid layer of graham crackers at the bottom of the dish before adding any filling. Ensure you break the crackers to fit tightly against the edges to prevent gaps, then alternate crackers and pudding layers, finishing with a final layer of crackers topped by the warm chocolate glaze.
No Bake Chocolate Eclair Cake

Ingredients:
Instructions:
Nutrition Facts:
| Calories | 426 kcal |
|---|---|
| Protein | 5.9 g |
| Fat | 16.5 g |
| Carbs | 63.4 g |
| Fiber | 1.1 g |
| Sugar | 42.8 g |
| Sodium | 478 mg |
