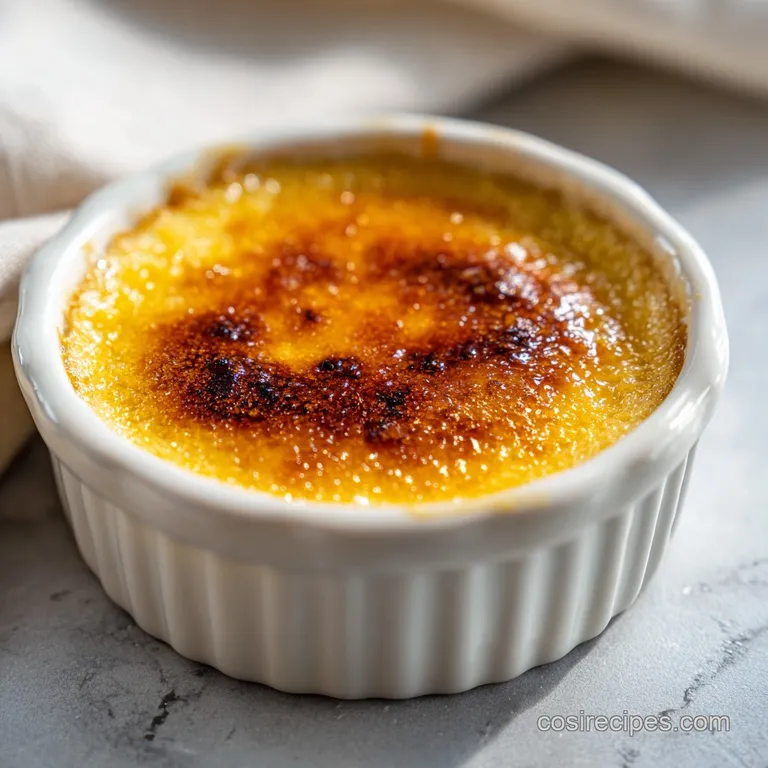
Tahitian Vanilla Bean Creme Brulee
- Time: Active 20 minutes, Passive 3 hours 50 mins, Total 4 hours 10 minutes
- Flavor/Texture Hook: Velvety cold custard beneath a shatter crisp warm sugar crust
- Perfect for: Anniversary dinners, holiday hosting, or a sophisticated weekend treat
- Why This Vanilla Bean Creme Brulee Is Magic
- Essential Science Behind The Silky Custard
- Choosing Premium Vanilla and Rich Cream
- Tools Required For A Perfect Bake
- Mixing Baking and Torching Your Dessert
- Solving Common Texture and Temperature Issues
- Creative Infusions to Change The Flavor
- Storage Guide and Zero Waste Tips
- Balancing Color and Garnish For Impact
- Recipe FAQs
- 📝 Recipe Card
Why This Vanilla Bean Creme Brulee Is Magic
There is a specific, high pitched clink when your spoon first meets the caramelized surface of a perfectly made custard. It sounds like breaking a thin sheet of winter ice. That first crack is everything.
I still remember my first attempt at this in my tiny apartment kitchen - I didn't have a torch, so I tried to use the oven broiler. I ended up with a soupy mess and a very sad, burnt smell that lingered for days.
But once you nail the balance between the cold, silky cream and the hot, crackling sugar, you'll never look back. This isn't just a dessert; it's a sensory event. We are using real Tahitian vanilla beans because they bring a floral, almost cherry like depth that bottled extract simply can't mimic.
Trust me, when you see those tiny black specks at the bottom of your ramekin, you know you've reached the big leagues.
The beauty of this recipe lies in its simplicity. We only have a handful of ingredients, so the technique is where the "magic" happens. We're going to treat our egg yolks with total respect, warming them slowly so they don't scramble, and giving the custard enough time to set in a quiet, bubbly water bath.
It’s a slow process, but that first bite makes the wait feel like nothing.
The Secret to this Vanilla Bean Creme Brulee
Gentle Denaturation: By using a low temperature water bath, we allow the egg proteins to uncoil and bond slowly, creating a mesh that traps fat and moisture without clumping into curds. This results in a texture so smooth it feels like silk on the tongue.
| Component | Classic Water Bath | Stovetop "Fast" Method | Texture Result |
|---|---|---|---|
| Cook Time | 45 minutes | 15 minutes | Classic is much silkier |
| Heat Source | Indirect (Water) | Direct (Pan) | Classic prevents curdling |
| Consistency | Delicate, set custard | Thick, pudding like | Classic is more elegant |
Essential Science Behind The Silky Custard
Success in the kitchen often comes down to understanding how fat and protein interact under pressure. In this recipe, the 36% fat content in our heavy cream acts as a protective buffer for the egg yolks. Without that fat, the eggs would seize and turn into breakfast the moment they hit the heat.
By keeping the temperature steady and low, we create a stable emulsion that stays creamy even after it cools.
Ingredient Deep Dive
| Ingredient | Science Role | Pro Secret |
|---|---|---|
| Egg Yolks | Emulsifier | Use room temperature yolks to prevent the cream from cooling too fast during tempering. |
| Heavy Cream | Texture Base | The high butterfat prevents the proteins from bonding too tightly, ensuring a soft set. |
| Superfine Sugar | Caramelization | Smaller crystals melt faster and more evenly under a torch flame than standard granulated sugar. |
The relationship between the sugar and the heat is also vital. When you torch the top, you're triggering the Maillard reaction and caramelization simultaneously. This creates complex, bitter sweet molecules that cut through the richness of the vanilla cream. If you’re looking for other textures to master, my Fluffy Japanese Pancakes recipe uses a completely different protein structure to achieve its height!
Choosing Premium Vanilla and Rich Cream
- 3 cups heavy cream: Look for "Heavy Whipping Cream" with at least 36% fat. Why this? Lower fat versions like half and half will result in a watery, unstable custard.
- 1 whole Tahitian vanilla bean: Split and scraped. Why this? Tahitian beans have floral notes that thrive in dairy based desserts.
- 0.5 cup granulated sugar: For the custard base. Why this? It dissolves cleanly into the warm cream without adding grit.
- 0.125 tsp fine sea salt: To balance the sweetness. Why this? Salt heightens the perception of vanilla and fat on the palate.
- 6 large egg yolks: Room temperature. Why this? Yolks provide the structure and that signature yellow, rich hue.
- 0.5 tsp vanilla bean paste: For extra specks. Why this? It reinforces the flavor if your bean is smaller or less potent.
- 6 tbsp superfine sugar: For the topping. Why this? It creates a more uniform, glass like "shatter" when torched.
| Original Ingredient | Substitute | Why It Works |
|---|---|---|
| Tahitian Vanilla Bean | 1 tbsp Vanilla Bean Paste | Contains the specks and concentrated flavor. Note: Slightly more sugar heavy. |
| Superfine Sugar | Granulated Sugar | Still caramelizes well. Note: May take longer to melt and could heat the custard. |
| Heavy Cream | Full fat Coconut Milk | Similar fat ratio. Note: Adds a distinct tropical flavor and may set softer. |
Tools Required For A Perfect Bake
You don't need a professional kitchen, but a few specific items are non negotiable here. A kitchen torch is the most important; those little butane torches are much more effective than a broiler. You'll also need six 6 ounce ramekins.
I prefer the wide, shallow ones because they provide more surface area for that crispy sugar crust.
A large roasting pan is necessary to act as the water bath. This protects the sides of the ramekins from direct oven heat, ensuring the edges don't overcook before the center is set. If you don't have a roasting pan, any deep baking dish will work, as long as the water can reach halfway up the sides of your ramekins.
Finally, a fine mesh sieve is your best friend for removing any stray bits of egg or vanilla pod.
Chef's Tip: Place a paper towel or a thin kitchen towel at the bottom of your roasting pan before adding the ramekins. This prevents them from sliding around and acts as an extra insulator against the harsh heat from the bottom of the oven.
Mixing Baking and Torching Your Dessert
Phase 1: Infusing the Liquid Gold
- Preheat oven to 300°F (150°C). Place your ramekins inside a large roasting pan and set aside.
- Combine cream and vanilla. Pour the 3 cups heavy cream into a medium saucepan. Add the scraped seeds and the pod from the Tahitian vanilla bean.
- Heat the mixture. Bring the cream to a gentle simmer over medium heat until small bubbles form around the edges. Note: Do not let it reach a rolling boil.
- Steep the vanilla. Remove from heat, cover, and let sit for 15 minutes. This allows the oils in the bean to fully marry with the cream.
Phase 2: The Tempering Dance
- Whisk the yolks. In a separate bowl, whisk the 6 egg yolks with 0.5 cup granulated sugar and the sea salt until pale and slightly thickened.
- Slowly temper the eggs. Gradually whisk about half a cup of the warm cream into the yolk mixture. Note: This raises the egg temperature slowly so they don't scramble.
- Combine and strain. Whisk in the remaining cream and the 0.5 tsp vanilla bean paste. Strain the entire mixture through a fine mesh sieve into a clean pitcher.
Phase 3: The Gentle Bake & Chill
- Fill the ramekins. Divide the custard evenly among the 6 ramekins.
- Prepare the water bath. Pour hot water into the roasting pan until it reaches halfway up the sides of the ramekins.
- Bake the custards. Bake for 35-45 minutes until the edges are set but the center jiggles slightly like Jello.
- Chill thoroughly. Remove ramekins from the water, cool to room temperature, then refrigerate for at least 3 hours (or up to 2 days).
Phase 4: Achieving the Shatter Crisp Top
- Apply the sugar. Just before serving, sprinkle 1 tbsp superfine sugar evenly over each cold custard.
- Torch to finish. Use a kitchen torch to melt the sugar using a circular motion until it turns deep amber and starts bubbling. Wait 2 minutes for it to harden into a glass like shell.
Solving Common Texture and Temperature Issues
If your custard comes out looking more like scrambled eggs than a silky dream, don't panic. It usually happens because the oven was too hot or the water bath ran dry. The water bath is your safety net; it keeps the temperature around the custard at a constant 212°F (100°C), which is the boiling point of water, even if your oven fluctuates.
Why Your Custard Is Soupy
If you pull them out of the oven and they look like liquid, they simply need more time or a higher internal temperature. A finished Classic Creme Brulee recipe should reach an internal temperature of exactly 170°F. If you've reached that and it's still thin, check your cream's fat content; anything lower than 36% will struggle to hold a firm shape.
| Problem | Root Cause | Solution |
|---|---|---|
| Tiny bubbles on top | Whisking too vigorously | Tap the ramekins on the counter or use a torch flame to pop bubbles before baking. |
| Grit in the custard | Undissolved sugar | Ensure you whisk the sugar into the yolks until the mixture is pale and smooth. |
| Rubbery texture | Overcooking | Pull the custards when the center still has a distinct wobble; they set further as they cool. |
Common Mistakes Checklist
- ✓ Never skip the straining step; it removes the "chalazae" (egg white bits) for a perfectly smooth finish.
- ✓ Always use a water bath; dry heat will make the edges rubbery and the top skin like.
- ✓ Pat the surface of the chilled custard dry with a paper towel before adding sugar to ensure a crisp crust.
- ✓ Don't torch the sugar too close to the surface; keep the flame moving to avoid bitter, black spots.
- ✓ Wait at least 2 minutes after torching; the sugar needs time to crystallize into a hard sheet.
Creative Infusions to Change The Flavor
While the vanilla bean is the star here, you can easily pivot this recipe. To double down on the richness, try adding 1 tablespoon of espresso powder to the warm cream for a "Cafe au Lait" vibe. If you want something brighter, steep the zest of two oranges in the cream alongside the vanilla.
For those looking for a different experience, a Vanilla Bean Substitute Hack is to use 1 tablespoon of vanilla bean paste. It still provides those beautiful black specks but is much easier on the wallet.
If you're hosting someone dairy-free, you can swap the heavy cream for full fat coconut milk, though the texture will be slightly less dense.
Scaling the Recipe
- To Halve (3 Servings): Use 1.5 cups cream, 3 yolks, and half a bean. Use smaller ramekins or a smaller baking dish to keep the water bath depth consistent.
- To Double (12 Servings): Use 6 cups cream and 12 yolks. You will likely need two roasting pans and should rotate them halfway through baking to ensure even heat distribution.
- Pro Tip: When doubling, keep the salt to 0.25 tsp total; spices don't always need a linear 2x increase.
Storage Guide and Zero Waste Tips
Storage: Keep the baked, un torched custards in the fridge for up to 3 days. Wrap them tightly with plastic wrap, ensuring the wrap doesn't touch the surface of the custard, as this can cause condensation. Once you torch the sugar, you must serve it within an hour.
The sugar is hygroscopic, meaning it pulls moisture from the custard and the air, eventually turning that "shatter" into a sticky syrup.
Freezing: I don't recommend freezing finished creme brulee. The emulsion of the cream and egg often breaks upon thawing, leaving you with a weeping, grainy mess.
Zero Waste: You'll have 6 leftover egg whites from this recipe. Don't toss them! Store them in an airtight container in the fridge for up to 4 days or freeze them for months. They are perfect for making a batch of meringues, a healthy egg white omelet, or adding lift to a cake.
Balancing Color and Garnish For Impact
A pale yellow custard is a beautiful canvas, but it needs a little contrast to truly pop on the plate. I follow a three color rule for garnishing this dish to make it look professional.
- Vibrant Red: Add 3 fresh raspberries to the side of the ramekin. The tartness cuts through the heavy fat of the cream.
- Deep Green: A single, small mint leaf tucked next to the berries adds a fresh aroma and a sharp color contrast against the amber sugar.
- Gold/Dark Brown: The caramelized sugar itself is the third color. Ensure you have a range of amber to mahogany across the surface for a rustic, "burnt" aesthetic.
Add these garnishes immediately after the sugar has hardened but before the plate reaches the table. If you're looking for more "wow factor" desserts, the presentation of Fluffy Japanese Pancakes offers a similar opportunity for creative fruit plating.
- Searing seals in the flavor
- Torching the sugar doesn't "trap" flavor; it adds a new layer of bitter sweet complexity through the Maillard reaction.
- Cold eggs are fine
- Using cold yolks can shock the warm cream and lead to uneven cooking. Always let them sit out for 20 minutes first.
- More sugar equals more crunch
- If the sugar layer is too thick, you'll have to torch it so long that the custard underneath melts and becomes soup. A thin, even layer is the secret.

Recipe FAQs
Does crème brûlée have vanilla bean?
Yes, traditional recipes do. Using real vanilla bean seeds provides the signature black specks and a deeper, floral aroma than extract alone.
What does vanilla creme brulee taste like?
It tastes like rich, silky vanilla custard beneath a warm, sharp layer of burnt sugar. The flavor profile balances deep dairy fat with a hint of contrasting bitterness from the caramelization.
Can I use vanilla bean instead of vanilla extract?
Yes, vanilla bean is superior to extract here. Use one scraped bean pod for infusion into the cream to achieve the best flavor depth and visual specks.
What is vanilla bean brulee?
It is the same dessert, emphasizing the use of whole vanilla beans. "Brulee" is the French term for burnt, referring to the hardened caramelized sugar crust.
How to ensure the sugar crust cracks perfectly?
Sprinkle superfine sugar thinly and evenly over the thoroughly chilled custard. Use a kitchen torch on medium heat and move the flame constantly until the sugar turns dark amber.
Is it true I must use a water bath to bake creme brulee?
No, this is a common misconception, but highly recommended for best texture. A water bath, or bain marie, insulates the custard, preventing the edges from setting too fast and becoming rubbery.
How to temper the egg yolks correctly?
Slowly whisk about half a cup of warm cream into the egg yolks gradually. This slowly raises the egg temperature, preventing them from scrambling into curds when combined with the rest of the hot liquid.
Vanilla Bean Creme Brulee Recipe

Ingredients:
Instructions:
Nutrition Facts:
| Calories | 579 kcal |
|---|---|
| Protein | 5.4 g |
| Fat | 48 g |
| Carbs | 32 g |
| Fiber | 0 g |
| Sugar | 29 g |
| Sodium | 75 mg |
