Fluffy Dairy Free Pancakes: Diner Stack
- Time: Active 5 minutes, Passive 10 minutes, Total 15 minutes
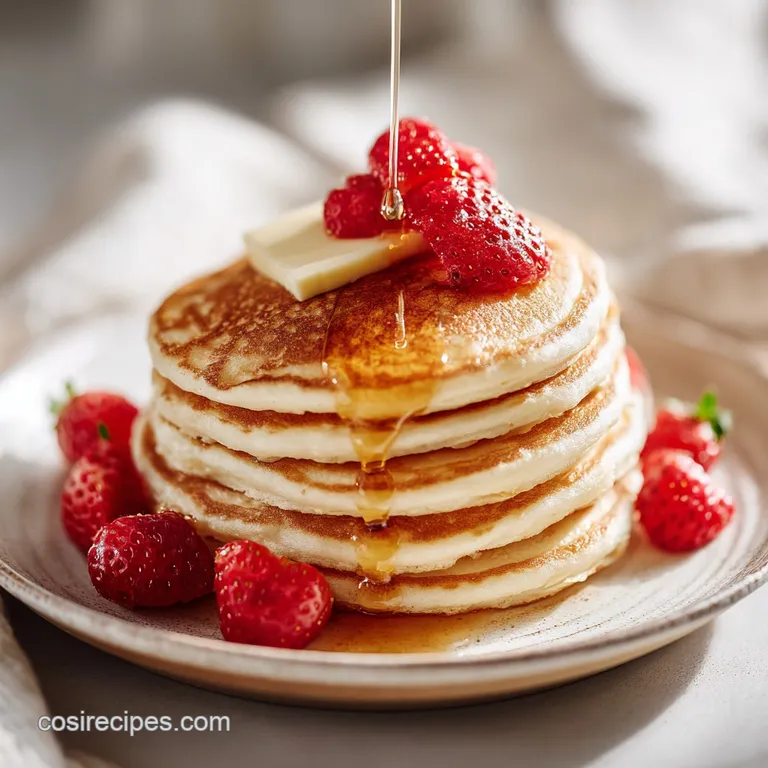
- Flavor/Texture Hook: Airy, bouncy centers with golden, lacey edges
- Perfect for: Slow Saturday mornings, brunch hosting, or vegan friendly celebrations
- The Secret to Fluffy Dairy Free Pancakes
- How This Recipe Works Well
- Pancake Recipe Specifications
- Breaking Down Every Ingredient
- Essential Tools for Success
- From Raw Batter to Plate
- Solving Your Pancake Problems
- Customizing Your Morning Stack
- Troubleshooting Common Issues
- Making Adjustments for Crowds
- Debunking Pancake Myths
- Keeping Your Leftovers Fresh
- Top Sides for Serving
- Recipe FAQs
- 📝 Recipe Card
The Secret to Fluffy dairy-free Pancakes
There is a specific sound that happens when cold batter hits a hot, oiled skillet. It's a gentle, rhythmic hiss that signals the start of something wonderful. I remember the first time I tried making these without the usual milk.
I was standing in my kitchen at 7:00 AM, pajamas still on, staring at an empty carton of 2%. I almost gave up and had toast, but then I remembered a trick my grandmother used for "emergency" biscuits.
That morning changed my breakfast game forever. I realized that you don't actually need dairy to get that iconic, cloud like lift. In fact, sometimes dairy-free versions are even lighter because we aren't weighed down by heavy milk proteins.
When you pull these off the griddle, they don't just sit there; they have a certain bounce. It's almost like magic, but I promise it's just really good chemistry.
We've all had those dense, leaden "health" pancakes that feel like eating a hockey puck. These are the opposite. They are elegant, airy, and honestly, better than the original. You are going to love how the edges get slightly crisp in the oil while the middle stays velvety and soft.
Let's get into how we make that happen without any fancy equipment or expensive milk substitutes.
How This Recipe Works Well
The success of these pancakes depends on a few specific chemical interactions that replace the structural properties of dairy. Here is why this specific method yields such a tall, airy result every single time:
- Acidic Activation: The apple cider vinegar curdles the plant milk, creating a DIY buttermilk that reacts violently (in a good way) with the baking powder.
- The Double Leavening Effect: We use a significant amount of baking powder to ensure the batter lifts the moment it hits the heat and stays lifted as it sets.
- Oil Based Tenderness: Using neutral oil instead of melted butter keeps the crumb moist even after the pancakes cool down, as oil stays liquid at room temperature.
- The Physics of the Rise: When the acid in our "buttermilk" meets the baking powder, it releases carbon dioxide bubbles that get trapped by the gluten, causing the batter to expand.
Comparing Classic vs. Fast Methods
| Feature | The Classic Way | This Fast Method |
|---|---|---|
| Prep Time | 20 minutes | 5 minutes |
| Texture | Dense and cakey | Light and bouncy |
| Fat Source | Heavy Butter | Light Neutral Oil |
The choice between methods usually comes down to how much time you have. While classic recipes often require resting the batter for half an hour to hydrate the flour, this version uses the immediate reaction between the vinegar and the leavening agents to get you to the table faster. If you enjoy quick morning meals, you might also find my Hibachi Fried Rice recipe helpful for those busy weeknights when speed is the priority.
Pancake Recipe Specifications
Before you start whisking, you need to know exactly what to look for at each stage. Precision is the difference between a flat crepe and a towering stack. These three checkpoints will guide your progress.
- The Buttermilk Curdle: After 5 minutes of resting the milk and vinegar, you should see small white clumps or a thickened texture.
- The Batter Consistency: It should be thick enough to hold its shape for 2 seconds when dropped from a spoon, not running like water.
- The Heat Index: Your pan is ready at exactly 325°F, or when a drop of water dances and evaporates in 3 seconds.
Essential Ingredient Analysis
| Component | Science Role | Pro Secret |
|---|---|---|
| Apple Cider Vinegar | Denatures proteins | Don't swap for white vinegar if you want a subtle sweetness. |
| Baking Powder | Provides CO2 lift | Use aluminum free to avoid a "tinny" aftertaste in the fluff. |
| Neutral Oil | Inhibits gluten | Avocado or grapeseed oil creates the cleanest flavor profile. |
| Cane Sugar | Maillard Reaction | This is what creates those beautiful golden brown spots on the surface. |
Every ingredient here has a job. The 2 tablespoons of baking powder might seem like a lot, but trust the process. Because we don't have the fat from dairy to help with the structure, we rely on that extra boost of leavening to keep things from getting heavy.
Breaking Down Every Ingredient
Right then, let's look at what's going into the bowl. I’ve listed exactly what you need based on the quantities that actually work.
- 1.5 cups unsweetened plant based milk: I prefer soy or oat for the best protein structure. Why this? Higher protein milks mimic cow's milk better for browning.
- Substitute: Unsweetened almond milk (Note: will be slightly thinner).
- 1 tablespoon apple cider vinegar: This is our activator.
- Substitute: Fresh lemon juice.
- 2 cups all purpose flour: The foundation of our stack.
- Substitute: 1 to-1 gluten-free flour blend (Note: result will be denser).
- 3 tablespoons cane sugar: For just a hint of sweetness.
- Substitute: Coconut sugar or maple syrup.
- 2 tablespoons baking powder: The engine of the "fluff."
- Substitute: None (this is critical).
- 0.5 teaspoon fine sea salt: To balance the sugars.
- Substitute: Kosher salt (use a full teaspoon).
- 3 tablespoons neutral oil: Keeps things moist.
- Substitute: Melted coconut oil.
- 1 teaspoon pure vanilla extract: For that "bakery" aroma.
- Substitute: Almond extract (use only 1/4 teaspoon).
- 1 large egg: Binds everything together.
- Substitute: One "flax egg" (1 tbsp ground flax + 3 tbsp water).
Chef's Tip: Whisk your dry ingredients for at least 30 seconds. This isn't just about mixing; it's about aerating the flour so the pancakes don't turn out like lead.
Essential Tools for Success
You don't need a professional kitchen, but a few specific items make this much easier. A heavy bottomed skillet is your best friend here. It distributes heat evenly so you don't end up with one burnt pancake and three raw ones.
- Large Mixing Bowl: For the dry mix.
- Medium Liquid Measuring Cup: To curdle the milk.
- Non stick Griddle or Cast Iron Skillet: I love a seasoned cast iron for those crispy edges.
- Wide Spatula: A thin, flexible turner makes flipping a breeze.
- Whisk: To ensure no flour pockets remain.
If you're making these for a crowd, an electric griddle set to 350°F is a lifesaver. It allows you to cook six at a time rather than two. If you're more into meal prepping for the week, you might also like the efficiency of the Taco Rice Bowls recipe which handles large batches just as elegantly as these pancakes.
From Raw Batter to Plate
Let's get cooking. Follow these steps closely, especially the parts about not over mixing. That is the number one mistake people make!
- Curdle the milk. Stir the 1.5 cups plant milk and 1 tablespoon vinegar in a cup and let it sit for 5 minutes until thickened. Note: This creates your dairy-free buttermilk.
- Combine dry ingredients. Whisk the 2 cups flour, 3 tablespoons sugar, 2 tablespoons baking powder, and 0.5 teaspoon salt in a large bowl.
- Mix wet ingredients. Add the 3 tablespoons oil, 1 teaspoon vanilla, and 1 egg to your curdled milk and whisk until the egg is fully integrated.
- Create a well. Push the flour to the sides of the bowl to make a hole in the center for the liquids.
- Fold gently. Pour the wet mix into the well and stir with a spatula until just combined. Note: Lumps are your friend; don't over work the gluten!
- Preheat the pan. Grease your skillet lightly and heat over medium low until a drop of water sizzles.
- Portion the batter. Pour about 1/4 cup of batter per pancake onto the hot surface.
- Watch for bubbles. Cook for 2-3 minutes until the edges look set and bubbles stay open.
- The Flip. Slide your spatula underneath and flip in one quick motion.
- Finish and serve. Cook the second side for 1-2 minutes until golden and bouncy to the touch.
Solving Your Pancake Problems
Even the best cooks have a "first pancake" fail. It's usually a heat issue. If your first one looks wonky, don't panic! It's just the pan's way of calibrating.
Why Your Pancakes Are Flat
If your pancakes look more like crepes, your baking powder might be old, or you over mixed the batter. Over mixing knocks out all those lovely air bubbles we worked so hard to create. Use a light hand and stop the second the flour streaks disappear.
Why Is the Outside Burnt?
This happens when the pan is too hot. The sugar in the batter caramelizes (and then burns) before the middle has a chance to set. Turn the heat down to medium low. A lower, slower heat allows the pancake to rise fully without scorching the surface.
| Problem | Root Cause | Solution |
|---|---|---|
| Gummy Center | Heat too high | Lower heat and cook longer per side. |
| Tough Texture | Over mixing | Stir until just combined; leave the lumps. |
| No Rise | Dead baking powder | Check expiration or add a pinch of baking soda. |
Common Mistakes Checklist
- ✓ Never press down on the pancake with your spatula (it crushes the air pockets).
- ✓ Don't skip the 5 minute milk rest; the acid needs time to work.
- ✓ Use a neutral oil like canola or vegetable; olive oil is too strong for this.
- ✓ Wipe the pan between batches to prevent burnt oil residue.
- ✓ Test the heat with a tiny spoonful of batter before committing to a full pancake.
Customizing Your Morning Stack
One of the best things about this recipe is how versatile it is. You can change the vibe entirely just by tossing in a few extras.
Troubleshooting Common Issues
| Issue | Solution |
|---|---|
| Make Fluffy dairy-free Banana Pancakes | Absolutely! Fold in half a cup of mashed overripe banana into the wet ingredients. It adds a wonderful natural sweetness and extra moisture. Just be aware that the pancakes will be slightly denser bec |
| Make These Into Healthy Fluffy dairy-free Pancakes | To boost the nutrition, swap half of the all purpose flour for whole wheat pastry flour or oat flour. You can also replace the cane sugar with a few drops of liquid stevia or monk fruit sweetener. Add |
| Add "Mix ins" Without Losing the Lift | Yes, but don't stir them into the bowl. Instead, pour the batter onto the griddle and then sprinkle your chocolate chips, blueberries, or chopped nuts directly onto the wet side of the pancake. This p |
Making Adjustments for Crowds
If you're hosting a big brunch, you'll need to scale this up. Doubling the recipe is straightforward, but don't just double everything blindly.
- Scaling Up (2x): Use 4 cups flour, 3 cups milk, and 2 eggs. However, only use 3 tablespoons of baking powder instead of 4, or they might taste slightly metallic.
- Scaling Down (1/2): For two people, halve everything. Since you can't easily halve an egg, beat it in a small bowl first and then use about 2 tablespoons of the liquid.
- Baking Large Batches: If you're making 20+ pancakes, don't let them sit on a plate. Put a wire rack on a baking sheet and keep them in a 200°F oven. The rack prevents the bottoms from getting soggy from the steam.
| Servings | Flour Amount | Milk Amount | Pan Size |
|---|---|---|---|
| 2 People | 1 cup | 0.75 cup | 8 inch skillet |
| 4 People | 2 cups | 1.5 cups | 12 inch skillet |
| 8 People | 4 cups | 3 cups | Large Electric Griddle |
Debunking Pancake Myths
We've all heard the "rules" for pancakes, but some of them are just plain wrong. Let's clear the air so you can cook with confidence.
Myth: You must wait for the bubbles to pop before flipping. Truth: You should flip when the bubbles start to form and the edges look matte/dry. If you wait until every bubble has popped, the first side will be overcooked and the second side won't have enough moisture left to brown properly.
Myth: Sifting flour is a waste of time. Truth: While you don't always need a sifter, whisking the dry ingredients is non negotiable. It breaks up clumps of baking powder. If you've ever bitten into a bitter clump of leavening, you know exactly why this matters.
Keeping Your Leftovers Fresh
Pancakes are surprisingly good as leftovers if you store them correctly. Don't just throw them in a pile in the fridge, or they'll turn into a giant dough ball.
Storage: Let the pancakes cool completely on a wire rack. Once cold, stack them with a small square of parchment paper between each one. Place the stack in an airtight container or a reusable silicone bag. They will stay fresh in the fridge for up to 4 days.
Freezing: These freeze beautifully! Follow the parchment paper stacking method and place them in a freezer safe bag. They'll last for 2 months. You can reheat them directly from frozen in a toaster it's like having your own high end "eggo" style breakfast but a thousand times tastier.
Zero Waste: If you have leftover batter, don't toss it. It keeps in the fridge for 24 hours. Just know that the second day pancakes won't be quite as fluffy because the baking powder will have lost some of its "oomph." You can also use leftover cooked pancakes to make a "Pancake Bread Pudding" by cubing them and baking them with a custard of plant milk and cinnamon.
Top Sides for Serving
What you put on top is just as important as the pancake itself. While maple syrup is the gold standard, there are so many other ways to make these feel like a master level meal.
- The Classic: high-quality maple syrup and a dollop of vegan butter.
- The Tropical: Sliced mango, toasted coconut flakes, and a squeeze of lime.
- The Decadent: A smear of almond butter, sliced strawberries, and a drizzle of melted dark chocolate.
- The Savory Balance: Serve these alongside some crispy tempeh bacon or a side of fresh berries to cut through the richness.
If you are looking for a complete brunch spread, these pancakes pair excellently with a side of fruit salad or even a small bowl of rice if you're into a "breakfast bowl" vibe. For a different take on a satisfying meal, check out the Charleston Red Rice recipe which brings a totally different, savory energy to your table.
Trust me, once you master this dairy-free base, you'll never go back to the boxed mix again. It's simple, it's fast, and the results are consistently elegant. Enjoy your breakfast!

Recipe FAQs
What plant milk works best for maximizing fluffiness?
Oat or soy milk performs best. Their higher protein content mimics traditional dairy milk better, giving the batter more structure to hold the leavening gas.
How long should the batter rest after mixing?
No rest time is required for the main batter. The chemical reaction between the vinegar and baking powder is immediate, allowing you to cook them right away.
How to tell if the pan temperature is correct for the first pour?
Test the heat with a drop of water. It should dance across the surface and evaporate completely within three seconds; if it evaporates instantly, the pan is too hot.
Is it true you must avoid over mixing dairy-free batter?
Yes, avoiding over mixing is critical for height. Stir only until the dry streaks of flour disappear; overworking develops gluten, leading to tough, dense pancakes.
How to make fluffy dairy-free banana pancakes?
Fold in half a cup of mashed ripe banana. Add this to the wet ingredients, but remember that the extra moisture may slightly reduce the overall height compared to the plain version.
Can I use apple cider vinegar if I don't have any?
Yes, fresh lemon juice is an acceptable substitute. Use a direct 1:1 swap, as both ingredients provide the necessary acid to activate the baking powder for lift.
How to prevent my leftovers from becoming soggy?
Cool the pancakes completely on a wire rack first. Stacking them while warm traps steam, making the bottoms damp; use parchment paper between layers when refrigerating or freezing.
Fluffy dairy-free Pancakes

Ingredients:
Instructions:
Nutrition Facts:
| Calories | 389 kcal |
|---|---|
| Protein | 8.4 g |
| Fat | 12.9 g |
| Carbs | 64.6 g |
| Fiber | 2.1 g |
| Sugar | 9.6 g |
| Sodium | 715 mg |
