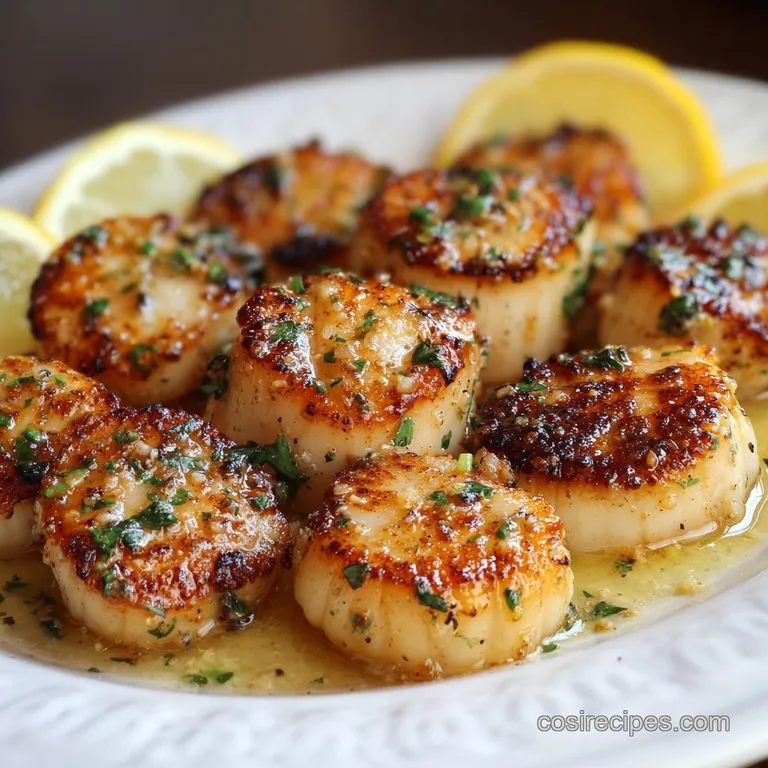
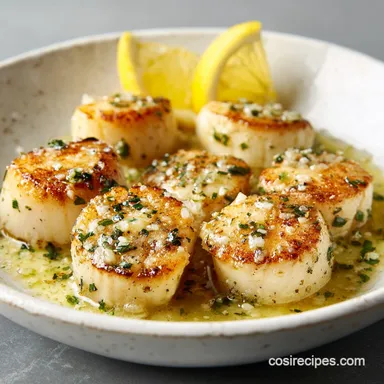
Pan Seared Scallops with Garlic Butter
- Time: Active 10 mins, Passive 5 mins, Total 15 mins
- Flavor/Texture Hook: Shatter crisp crust with a velvety interior
- Perfect for: Romantic dates, holiday starters, or impressive weeknight treats
- Perfectly Golden Pan Seared Scallops
- The Science of Searing
- Component Analysis and Secrets
- Sourcing Your Best Seafood
- Essential Tools for Success
- Professional Searing Instructions
- Fixing Sear Problems
- Multiplying Your Servings
- Debunking Seafood Misconceptions
- Storage and Waste Tips
- Professional Plating Techniques
- Recipe FAQs
- 📝 Recipe Card
Perfectly Golden Pan Seared Scallops
The first time I tried to make scallops, it was a disaster. I remember the high pitched sizzle turning into a sad, watery hiss within seconds. Instead of the golden brown crust I saw on television, I had grey, rubbery lumps swimming in a pool of milky liquid.
I sat there in my tiny kitchen, staring at thirty dollars' worth of ruined seafood, wondering what on earth went wrong. It was a humbling moment that sent me down a rabbit hole of moisture control and thermal mass.
That failure taught me everything. Now, the second those scallops hit the hot oil, the aroma is instantly nutty and sweet, signaling a flawless crust. You want that sound to be a sharp, aggressive crackle, not a simmer.
When you get it right, the contrast between the salty, crisp exterior and the sweet, almost creamy middle is better than any steak you've ever had. We're going to make sure you never have to eat a rubbery scallop again.
The Science of Searing
The Maillard Reaction: High heat triggers a chemical reaction between amino acids and reducing sugars, creating that complex, savory crust. If there's even a drop of surface moisture, the energy goes into evaporating water (steaming) rather than browning.
Protein Denaturation: Scallops are mostly water and protein; overcooking them causes the protein fibers to tighten like a wrung out sponge, squeezing out all the moisture and creating a tough texture.
Fast, over high heat cooking keeps the center below the "rubbery" threshold of 130°F.
| Thickness | Internal Temp | Rest Time | Visual Cue |
|---|---|---|---|
| 1 inch | 125°F - 130°F | 2 mins | Sides look opaque but center is slightly translucent |
| 1.5 inches | 125°F - 130°F | 3 mins | Bottom edges are deeply golden and caramelized |
| 0.75 inch | 120°F - 125°F | 1 min | Quick sear only; translucent center is vital |
Getting the temperature right is the difference between a professional result and a home cook mistake. Because scallops are so lean, they don't have fat to protect them from the heat, making that resting period essential for the residual heat to finish the job without toughening the core.
Component Analysis and Secrets
| Ingredient | Science Role | Pro Secret |
|---|---|---|
| Dry Packed Scallops | Pure protein source | Avoid "wet" scallops treated with STPP which prevents browning. |
| Avocado Oil | High smoke point | Use a neutral oil that won't burn before the scallop crust forms. |
| Unsalted Butter | Emulsification & Flavor | Add at the end to baste; the milk solids provide a nutty finish. |
| Kosher Salt | Moisture extraction | Only salt the scallops immediately before they hit the pan. |
### The over High heat Base
Using the right fat is non negotiable for these pan seared sea scallops. You need an oil that can withstand 400°F without smoking your entire kitchen out. Avocado oil or grapeseed oil are my top picks because they stay neutral, letting the natural sweetness of the seafood shine.
### The Garlic Butter Finish
While the oil does the heavy lifting for the crust, the butter is there for the soul. By adding 3 cloves of smashed garlic and 2 tbsp of unsalted butter at the very end, we create a foamy bath that coats the scallop in a velvety layer of flavor. This is the same technique used for a high end steak.
Sourcing Your Best Seafood
You need 1 lb of dry packed large sea scallops for this recipe. If you see scallops sitting in a milky white liquid at the store, keep walking. Those are "wet" scallops treated with sodium tripolyphosphate. They soak up water weight, which then leaks out into your pan, making it impossible to get a real sear.
"Dry" scallops will be a natural creamy white or slightly pinkish hue and won't have that chemical smell.
If you cannot find high-quality scallops, you might enjoy trying a Pan Seared Chilean recipe which offers a similar buttery texture but is often more forgiving for beginners.
- 1 lb dry packed large sea scallops: Look for U-10 or U-12 sizes for the best results.
- Substitute: Large shrimp (peeled and deveined). Why this? Similar cook time and high protein structure.
- 2 tbsp neutral oil: I prefer avocado or grapeseed.
- Substitute: Light olive oil (not extra virgin). Why this? High smoke point is critical for the sear.
- 2 tbsp unsalted butter: Added for the finishing baste.
- Substitute: Ghee or clarified butter. Why this? Higher smoke point while keeping the buttery flavor.
- 3 cloves garlic: Smashed to release oils without burning.
- Substitute: 1 tsp garlic powder in the oil. Why this? Provides flavor if fresh isn't available.
- 0.5 lemon: For a bright, acidic finish.
- Substitute: 1 tsp white wine vinegar. Why this? Cuts through the richness of the butter.
- 0.5 tsp kosher salt: Use a coarse grain for better coverage.
- Substitute: Sea salt. Why this? Better texture than fine table salt.
- 0.25 tsp freshly cracked black pepper: For a subtle bite.
- Substitute: White pepper. Why this? Keeps the appearance clean and provides a floral heat.
- 1 tbsp fresh parsley: Finely chopped for garnish.
- Substitute: Fresh chives. Why this? Adds a mild onion note and bright green color.
Essential Tools for Success
You need a heavy bottomed skillet. Cast iron or stainless steel (like an All Clad) are the champions here because they hold onto heat. When you drop a cold scallop into a flimsy non stick pan, the temperature plummets, and you lose that chance for a crisp crust.
A fish spatula is also a massive help for getting underneath the scallops without tearing that beautiful crust you just worked so hard to build.
Chef Tip: Freeze your butter for 10 minutes before adding it to the pan. This slows down the browning of the milk solids, giving you more time to baste the scallops without the butter turning bitter or burnt.
Professional Searing Instructions

- Remove the tough side muscle. Look for the little rectangular tag of tissue on the side of the scallop. It's chewy and unpleasant, so just pinch and pull it right off.
- Dry the scallops aggressively. Use three layers of paper towels to pat the scallops dry. Note: Surface moisture is the enemy of the Maillard reaction.
- Season right before cooking. Sprinkle 0.5 tsp kosher salt and 0.25 tsp black pepper over the scallops. Note: Salting too early draws out moisture, making the surface wet again.
- Heat the skillet properly. Add 2 tbsp neutral oil to the pan over medium high heat until you see a faint shimmer and a tiny wisp of smoke.
- Place the scallops carefully. Use tongs to place them in the pan in a clockwise pattern. Listen for a sharp, aggressive sizzle.Note: If it doesn't sizzle loudly, the pan isn't hot enough; pull them out and wait.
- Sear without touching. Let them cook for 2 minutes. Do not move them, poke them, or peek. Wait until you see a dark golden ring forming at the base.
- Flip once. Turn the scallops over. They should release easily from the pan. Note: If they stick, they aren't done searing yet.
- Add the aromatics. Drop in 2 tbsp unsalted butter and 3 cloves of smashed garlic. As the butter foams, it will smell nutty and toasted.
- Baste for flavor. Tilt the pan and use a spoon to pour that liquid gold over the scallops for 1 minute.
- Finish with lemon. Squeeze 0.5 lemon over the pan and sprinkle with 1 tbsp parsley. Remove from heat immediately as the aroma of fresh citrus hits the air.
Fixing Sear Problems
### Pale and watery scallops
This is the most common heartbreak in seafood cooking. It usually happens because the pan was overcrowded or the scallops were "wet packed." When you put too many scallops in at once, the temperature of the metal drops, and the scallops begin to boil in their own juices rather than sear.
Work in batches if you have a smaller skillet.
### Stuck to the pan
If you try to flip a scallop and it resists, it's telling you it isn't ready. The protein undergoes a process called "release" once the crust has fully formed. Forcing it will just tear the delicate meat. Give it another 30 seconds, and it should pop right off.
| Problem | Root Cause | Solution |
|---|---|---|
| Rubbery Texture | Overcooking beyond 135°F | Pull from heat when the center is still slightly translucent. |
| Grey/No Crust | Surface was too wet | Use more paper towels and pat until the surface is tacky. |
| Burnt Butter | Heat was too high for too long | Add butter only in the last 60 seconds of cooking. |
Common Mistakes Checklist
- ✓ Never crowd the pan; leave at least an inch of space between each scallop.
- ✓ Use a high smoke point oil like avocado oil, never extra virgin olive oil for the sear.
- ✓ Wait for the oil to shimmer before the first scallop touches the pan.
- ✓ Remove the "foot" or side muscle from every single scallop before seasoning.
- ✓ Pat the scallops dry twice once when you take them out, and once right before they go in the pan.
Multiplying Your Servings
If you are cooking for a crowd, do not try to fit 2 lbs of scallops into one pan. You'll end up with a soggy mess. Instead, use two separate skillets or cook in two distinct batches.
If you cook in batches, wipe the pan out between rounds to prevent the leftover butter and garlic from burning and sticking to the new set.
For a larger dinner party, these pair beautifully with a Pan Seared Branzino recipe for a full Mediterranean seafood spread. The techniques are quite similar, focusing on high heat and skin side crisping.
- For 2 people: Simply halve the ingredients, but keep the oil amount the same to ensure the pan surface is well coated.
- For 8 people: Do not double the salt in the pan; season the scallops individually. Use two large 12 inch cast iron skillets simultaneously.
- Scaling Up Spices: When doubling the recipe, only use 1.5x the amount of black pepper to avoid overpowering the delicate scallop flavor.
Debunking Seafood Misconceptions
One major myth is that scallops must be cooked until they are solid white all the way through. If you do this, you've essentially created a very expensive eraser. high-quality sea scallops are safe and much better when the center remains "medium rare" or slightly translucent.
This preserves the natural sugars and the velvety texture.
Another misconception is that you need a non stick pan to prevent sticking. In reality, a seasoned cast iron or a stainless steel pan creates a better crust because they allow for better heat retention and the Maillard reaction.
Non stick coatings actually inhibit the "fond" (those little brown bits) from forming, which results in a less flavorful sear.
Storage and Waste Tips
Storage: Seared scallops are best eaten immediately. If you have leftovers, store them in an airtight container in the fridge for up to 2 days. To reheat, do not use a microwave! It will turn them into rubber. Instead, flash sear them in a very hot pan for 30 seconds per side.
Freezing: You can freeze raw scallops for up to 3 months. Thaw them overnight in the refrigerator on a bed of paper towels to soak up the moisture as they defrost. Never thaw them in warm water, as this begins to "cook" the delicate proteins.
Zero Waste: Don't toss those side muscles! While they are too tough for a prime sear, you can save them in a freezer bag. Once you have a handful, chop them up finely and add them to a seafood chowder or a pasta sauce for an extra boost of briny sweetness.
The lemon rinds can also be used to scent your garbage disposal after you've squeezed the juice.
Professional Plating Techniques
To get that restaurant look, don't just pile the scallops on a plate. Start with a vibrant green pea purée or a smooth cauliflower mash as a base. Place the scallops with the best looking seared side facing up.
Drizzle the remaining garlic butter from the pan around the edges, not directly over the crust, to keep that "shatter" texture intact.
If you are looking for more pan seared sea scallops dinner ideas, try serving them over a bed of wilted spinach or alongside a light citrus risotto. The bright green of the herbs and the deep gold of the crust make for a stunning visual contrast.
Chef Tip: Use a Microplane to grate a tiny bit of fresh lemon zest over the scallops right before serving. The volatile oils in the zest provide a massive aromatic punch that juice alone cannot match.
These pan seared scallops are all about confidence. Once you hear that sizzle and smell that sweet, caramelized aroma, you'll know you've mastered one of the finest dishes in the home cook's repertoire. Just remember: stay dry, stay hot, and don't touch them until they're ready to let go!

Recipe FAQs
Should you sear scallops in butter or oil?
Use oil first, finish with butter. High heat oils like avocado or grapeseed should be used for the initial sear because butter solids burn before a proper crust forms. Add the butter only at the very end for flavor and basting.
How long do you pan sear sea scallops?
Sear for about 2 minutes per side over medium high heat. The total cooking time is usually 4 5 minutes, depending on thickness. The key is to stop cooking once the sides are opaque but the center is still slightly translucent.
What's the secret to searing scallops perfectly?
Aggressive drying and high heat are the secrets. Pat the scallops completely dry with paper towels to remove all surface moisture, ensuring the Maillard reaction occurs immediately upon hitting the hot oil. If you're interested in mastering heat transfer, see how the same principles apply to crisping skin in our Mediterranean Whole Roasted Branzino Recipe (25 Min).
What seasoning is good for scallops?
Simple salt, pepper, and acid work best. Season generously with kosher salt and fresh black pepper immediately before they enter the hot pan. A squeeze of fresh lemon juice or a splash of white wine vinegar at the end brightens the sweetness.
Why do my scallops stick to the pan when searing?
They are sticking because the crust hasn't fully formed yet. If you try to move them and they resist, leave them alone for another 30 seconds; the proteins will release naturally once the proper sear develops. Mastering this release cue is crucial for texture; if you enjoy learning precise cooking cues, you’ll appreciate the temperature monitoring in our Sausage and Peppers recipe.
Must I use "dry packed" scallops for a good sear?
Yes, dry packed scallops are mandatory for a good sear. Wet scallops are treated with phosphates, causing them to retain water, which steams them instead of browning them. Only buy scallops that look natural and are not sitting in a milky liquid.
Is it necessary to remove the side muscle before cooking?
Yes, you must remove the side muscle. This small, tough piece of tissue, often called the "foot," will not cook tenderly like the rest of the muscle. Pinch it off with your fingers or a paper towel; it pulls away easily before seasoning.
Pan Seared Scallops Perfect Crust
Ingredients:
Instructions:
Nutrition Facts:
| Calories | 216 kcal |
|---|---|
| Protein | 19.6 g |
| Fat | 13.8 g |
| Carbs | 3.6 g |
| Fiber | 0.1 g |
| Sugar | 0.4 g |
| Sodium | 392 mg |
