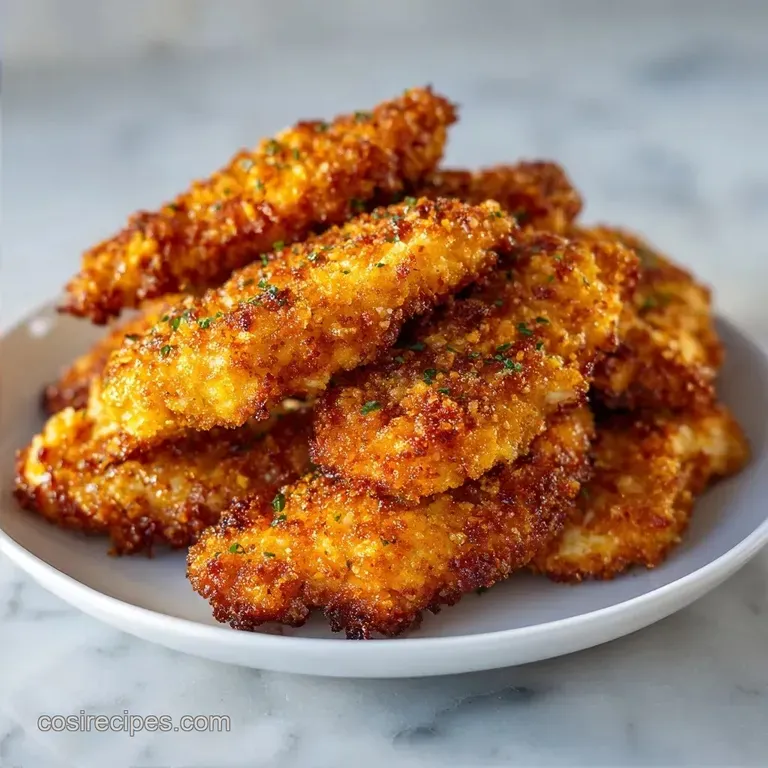
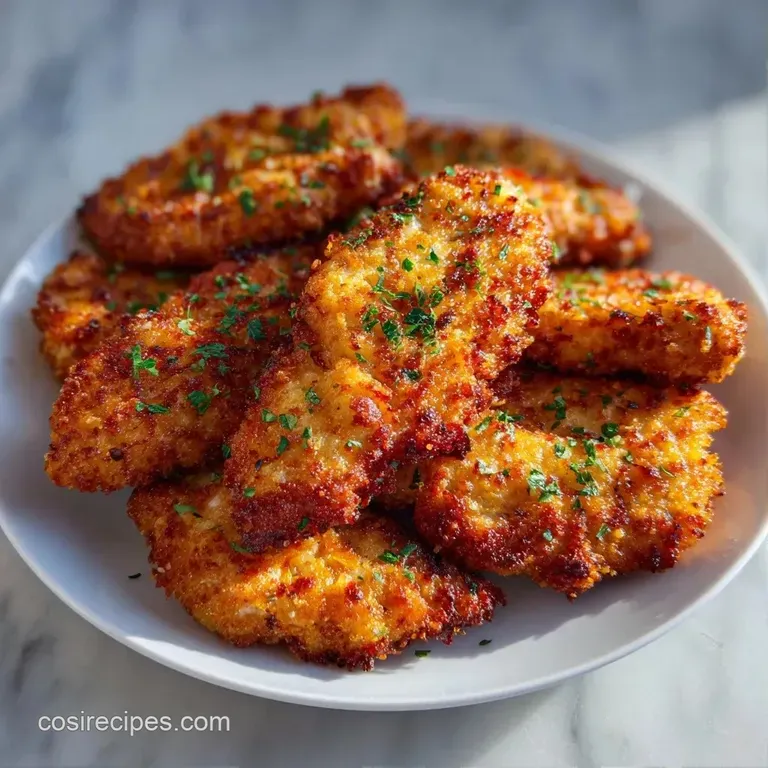
Baked Chicken Tenders: Crispy and Golden
- Time: 10 min active + 18 min baking
- Flavor/Texture Hook: Shatter crisp Panko with salty Parmesan
- Perfect for: Weeknight dinners or kid friendly meal prep
That sound of the first bite, that loud, satisfying crack, is exactly why I obsessed over this recipe. For a long time, I thought oven baked chicken was doomed to be bland and damp. I tried every shortcut, but most of them left me with a coating that felt more like wet cardboard than a crispy crust.
The real hero here is the Panko. Unlike standard breadcrumbs that pack together into a dense layer, Panko is processed into larger, airy flakes. These flakes create tiny pockets of air that let the heat circulate, which is the only way to get that "fried" feel without the vat of oil.
If you use regular crumbs, you lose that specific shatter.
I'm sharing this version because it's the one that actually works every single time. These Baked Chicken Tenders don't slide off the meat, and they don't dry out. It's a simple process, but the way we layer the binder and the breading makes a huge difference in the end result.
The Best Crispy Baked Chicken Tenders
Right then, let's talk about why this version beats the frozen stuff. Most store-bought tenders use a thick, gummy batter that masks the taste of the chicken. Here, the chicken is the star, and the coating is just there to provide a salty, crispy contrast.
I've found that using chicken tenderloins instead of slicing a breast gives you a more consistent cook time across the whole tray.
When you first pull these out of the oven, the smell of toasted Parmesan and paprika hits you immediately. It's that classic comfort food aroma, but without the heavy grease that usually follows a deep fry session.
Trust me on this, once you try the wire rack method, you'll never go back to placing your chicken directly on a baking sheet.
The goal here is a gold brown finish that looks like it came from a restaurant. We're aiming for a texture that is velvety on the inside and jaggedly crisp on the outside. Let's get into the details of how to make this happen.
Why These Tenders Work
Instead of a complex lab report, here's the real world reason these turn out so well:
- Airflow: Using a wire rack lets hot air hit the bottom of the meat, preventing the "soggy bottom" syndrome.
- The Binder: Adding Dijon mustard to the eggs creates a thicker, tastier glue that holds the Panko in place.
- Fat Distribution: The olive oil in the egg wash helps the breadcrumbs brown evenly without needing to deep fry.
- Cheese Browning: Parmesan contains fats and proteins that caramelize quickly at 400°F, adding a deep savory flavor.
Cook Method Comparison
| Method | Time | Texture | Best For |
|---|---|---|---|
| Deep Fried | 6-8 mins | Heavy Crunch | Maximum indulgence |
| Oven Baked | 18 mins | Light Shatter | Healthy weeknights |
| air fried | 12 mins | Very Dry Crisp | Small batches |
Component Analysis
| Ingredient | Science Role | Pro Secret |
|---|---|---|
| Panko | Texture | Press firmly to lock flakes in |
| Dijon Mustard | Adhesion | Adds a subtle tang that cuts through fat |
| Parmesan | Browning | Use finely grated for a seamless crust |
| Egg | Binding | Let excess drip off to avoid "clumping" |
The Ingredient Breakdown
I keep it simple here. You don't need a massive pantry, just a few key items that do the heavy lifting. For the breading, I strongly suggest Panko over regular breadcrumbs because the larger surface area is what gives you that specific crunch.
- 1.5 lbs chicken tenderloins Why this? Consistent size means even cooking (Substitute: Sliced chicken breast)
- 1 cup Panko breadcrumbs Why this? Superior crunch and airiness (Substitute: Crushed cornflakes)
- 1/2 cup finely grated Parmesan cheese Why this? Adds salt and golden color (Substitute: Pecorino Romano)
- 1 tsp garlic powder Why this? Uniform savory flavor (Substitute: Onion powder)
- 1 tsp paprika Why this? Gives that classic golden hue (Substitute: Smoked paprika for a woody taste)
- 1/2 tsp salt Why this? Basic flavor enhancer (Substitute: Kosher salt)
- 1/4 tsp black pepper Why this? Subtle heat (Substitute: White pepper)
- 2 large eggs Why this? Primary binder (Substitute: Flax egg for vegan)
- 1 tbsp Dijon mustard Why this? Improves stickiness and flavor (Substitute: Yellow mustard)
- 1 tbsp olive oil Why this? Helps the coating brown (Substitute: Melted butter)
Ingredient Swaps
| Original Ingredient | Substitute | Why It Works |
|---|---|---|
| Panko | Crushed Cornflakes | Similar crunch. Note: Sweeter taste, use less salt |
| Parmesan | Pecorino Romano | Same salty profile. Note: Much sharper, saltier flavor |
| Dijon Mustard | Yellow Mustard | Similar acidity. Note: Less "zing" and thinner consistency |
It's worth noting that if you're looking for a dip, these go great with my Homemade Tartar Sauce for a bit of a zesty contrast.
Essential Kitchen Tools
You don't need a professional kitchen, but a couple of specific tools make this easier. I use two shallow bowls for my dredging station so I can move the chicken back and forth without making a huge mess.
The most important piece of gear is the wire cooling rack. If you don't have one, you can use a muffin tin flipped upside down, though a rack is better. This keeps the tenders elevated, ensuring the heat hits every angle.
I also recommend a digital meat thermometer. It's the only way to be 100% sure your chicken is safe without overcooking it into a rubbery mess. According to USDA guidelines, poultry needs to hit 165°F to be safe, and a thermometer is the only way to track this accurately.
Step by step Process
Now, let's get these moving. I like to follow a strict flow: prep, coat, bake.
- Pat the chicken tenderloins completely dry with paper towels and season lightly with a pinch of salt and pepper. Note: Dry meat ensures the egg actually sticks
- Set up your dredging station. Bowl 1: Whisk together beaten eggs, Dijon mustard, and olive oil. Bowl 2: Mix Panko breadcrumbs, grated Parmesan, garlic powder, paprika, salt, and black pepper.
- Dip each chicken tender into the egg mixture. Let the excess drip off for a second so you don't get "doughy" spots.
- Press the tender firmly into the Panko mixture. Really push the crumbs into the meat until it's fully coated.
- Place the breaded tenders on a wire cooling rack set over a large baking sheet. Note: Leave space between them for airflow
- Preheat your oven to 400°F (200°C).
- Bake for 15-20 minutes. Wait until you see the edges turning a deep golden brown and the crumbs look toasted.
- Check the internal temperature. Remove them from the oven as soon as they hit 165°F (74°C).
- Let them rest on the rack for 3-5 minutes. Note: This lets the juices redistribute so the meat stays velvety
Chef's Note: If you want a thicker crust, you can do a double dredge (Egg -> Panko -> Egg -> Panko), but be careful as this increases the cook time by about 3-5 minutes.
Solving Common Mistakes
Even the best of us mess up. The most common issue with Baked Chicken Tenders is the breading sliding off the meat in one big sheet. This usually happens because the chicken was too wet when you started or you didn't press the crumbs in hard enough.
Another annoyance is the "soggy bottom." If you put your chicken directly on a pan, the juices leak out and steam the bottom of the breading. The wire rack solves this, but if you don't have one, flipping the tenders halfway through is your only real option.
Troubleshooting Guide
| Problem | Root Cause | Solution |
|---|---|---|
| Breading slides off | Meat was damp or egg too thin | Pat chicken bone dry with paper towels |
| Soggy bottom | No airflow under the meat | Use a wire rack or flip halfway |
| Dry, rubbery meat | Overcooked past 165°F | Use a digital thermometer to pull early |
Quick Quality Checklist
- ✓ Chicken patted completely dry before seasoning.
- ✓ Panko pressed firmly into the meat.
- ✓ Tenders placed on a wire rack, not a flat pan.
- ✓ Internal temperature exactly 165°F.
- ✓ Rested for 5 minutes before serving.
Flavor Twist Ideas
Once you have the base method down, you can really play with the flavors. I often swap the paprika for a mix of cayenne and chili powder if I want a spicy kick. It's a great way to make these more "adult" while keeping them kid friendly.
If you're feeling fancy, try adding a tablespoon of finely chopped fresh parsley or oregano to the Panko mixture. This gives it a fresh, herbal note that pairs beautifully with a creamy dip. For those who love a richer experience, these are fantastic when served with a side of Homemade Cheese Sauce.
Decision Shortcut
- Want more crunch? Use crushed cornflakes instead of Panko.
- Want more salt? Increase the Parmesan and skip the extra salt.
- Want a smoky flavor? Use smoked paprika and a pinch of cumin.
Adjusting Batch Sizes
When scaling this recipe, you have to be careful with the breading. If you're making a double batch (3 lbs of chicken), don't just double the spices. I find that spices like garlic powder and paprika can become overpowering, so only increase them to 1.5x.
For a half batch, you'll still need to beat a full egg, but you can just use half of the liquid. If you're baking a massive amount, work in batches. Overcrowding the oven lowers the temperature and can lead to steaming rather than roasting, which ruins the crunch.
Common Breading Myths
You'll often hear that you need to "seal in the juices" by searing the chicken first. Honestly, don't bother. Searing doesn't actually seal anything; it just adds flavor. In this recipe, the Panko and Parmesan create a barrier that helps keep the moisture in during the quick 18 minute bake.
Another myth is that you need a flour dredge before the egg. While some people like it, I've found it often adds too much bulk and makes the coating taste "pasty." A dry piece of chicken and a good egg mustard binder are all you really need for a professional grade hold.
Storage and Waste Tips
These Baked Chicken Tenders keep well in the fridge for up to 4 days. Store them in a single layer in an airtight container. To reheat them without losing the crunch, avoid the microwave at all costs.
Pop them back in the oven at 350°F for about 5-10 minutes, or use an air fryer for 3 minutes.
For freezing, let the tenders cool completely first. Flash freeze them on a tray for an hour before bagging them so they don't stick together. They'll stay good for up to 3 months.
To avoid waste, don't throw away the leftover egg wash if you only used a bit. You can whisk it into your morning scrambled eggs. If you have leftover Panko and Parmesan, toast them in a pan with a bit of butter and use them as a crunchy topping for a pasta dish or a salad.
Serving and Enjoying
The best way to serve these is immediately while the crust is still shattering. I love pairing them with a side of honey mustard or a spicy ranch. Because these are quite savory, a bright, acidic side like a vinegar based coleslaw or a crisp cucumber salad balances the richness perfectly.
If you're serving these for a crowd, keep them warm on a wire rack over a baking sheet in a low oven (200°F). This prevents them from steaming in a covered dish, which would soften the crust.
These are a huge hit with kids, but don't be afraid to add some red pepper flakes to your dipping sauce to give them a more sophisticated edge.
Right then, you've got the plan. Just remember: dry meat, firm press, and a wire rack. That's the secret to Baked Chicken Tenders that actually taste like they were fried. Now, go get that crunch!
Recipe FAQs
Is it better to bake chicken tenderloins at 350 or 400?
Bake at 400°F. This higher temperature is essential for crisping the Panko breadcrumbs quickly without overcooking the interior of the meat.
How long should chicken tenders go in the oven?
Bake for 15 20 minutes. Use a digital thermometer to ensure the internal temperature reaches 165°F for safety and juiciness.
How long does it take chicken to bake at 400 degrees?
Allow 15 20 minutes. The exact timing depends on the thickness of the tenderloins, but this range provides a golden brown crust.
How to bake real good chicken tenders?
Pat the chicken completely dry with paper towels before breading. Dip them in an egg and Dijon mixture, press into a Panko and Parmesan blend, and bake on a wire rack to prevent soggy bottoms.
What are some healthy meal ideas for fussy kids?
Serve these baked tenders with fresh fruit or steamed vegetables. For a faster alternative to oven baking, try air fryer chicken for a similarly kid-friendly meal.
Are there any special dinner ideas for toddlers?
Provide bite sized strips of these baked chicken tenders. Their tender interior and mild flavor make them easy for toddlers to chew and enjoy.
Is it true you can bake these directly on a pan for the same crunch?
No, this is a common misconception. Baking directly on a baking sheet traps moisture underneath the meat; a wire rack is necessary for airflow and maximum crispiness.
Baked Chicken Tenders

