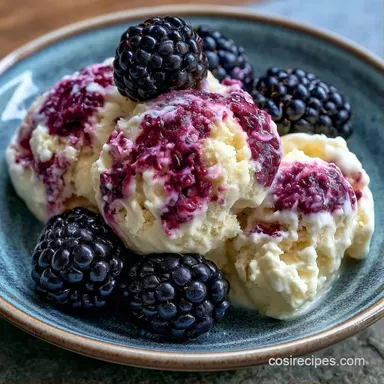
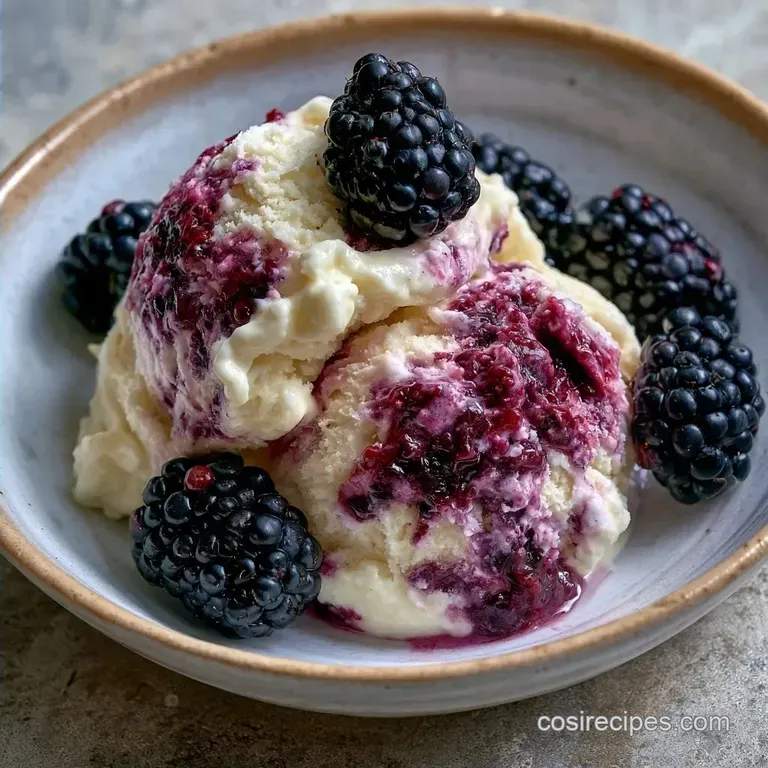
No-Churn Blackberry Vanilla Ice Cream
- Time: 15 min active + 6 hours 25 mins chilling
- Flavor/Texture Hook: Tart berry ribbons in a rich, creamy vanilla base
- Perfect for: Summer dessert parties or a treat for kids
- Reasons to Make This Treat
- Quick Technical Details
- The Pantry List
- Necessary Kitchen Tools
- Step by Step Process
- What Actually Makes It Creamy
- Troubleshooting Common Issues
- Fun Flavor Twists
- Adjusting the Batch Size
- Common Kitchen Myths
- Storage and Freshness Tips
- Serving Suggestions
- Recipe FAQs
- 📝 Recipe Card
The smell of simmering blackberries fills the kitchen with a deep, jammy aroma that hits you the moment you walk through the door. It's a scent that feels like July in a bowl. For a long time, I thought you needed one of those expensive, heavy duty churning machines to get a texture that didn't feel like a frozen block of ice.
Forget the idea that a churner is mandatory for a professional result. You actually don't need one at all. By using a specific combination of fats and sugars, you can get that same luxurious mouthfeel using nothing but a hand mixer and a loaf pan.
This Blackberry Vanilla Ice Cream relies on air and stability rather than mechanical churning. You'll get a dense, creamy scoop with bright streaks of fruit that cut through the sweetness. It's simple, but it looks like it came from a high end creamery.
Reasons to Make This Treat
Most store-bought berry ice creams use syrups that taste like candy. Making this at home lets you control the tartness. Using fresh blackberries gives you a brightness that balances the heavy cream. It's a refreshing contrast that makes the dessert feel lighter than it actually is.
I love how this recipe handles the "ice crystal" problem. By folding in whipped cream, we trap millions of tiny air bubbles. These bubbles act as barriers, preventing the water in the fruit from freezing into jagged shards. The result is a smooth, consistent texture in every bite.
It also saves a massive amount of cleanup. You aren't scrubbing a churning bowl or dealing with a noisy machine on your counter. You just mix, swirl, and freeze. It's the kind of dessert that feels fancy but takes almost no effort during the actual assembly.
Quick Technical Details
Before you start, it's helpful to know how this differs from traditional custard based ice creams. Most classic recipes require tempering eggs over a stove, which is a bit of a hassle. This version uses a "no churn" method that is faster and more forgiving.
| Method | Prep Time | Texture | Best For |
|---|---|---|---|
| No Churn | 15 mins | Dense & Creamy | Quick cravings |
| Traditional | 45 mins | Light & Airy | Formal dinner parties |
| Soft Serve | 10 mins | Soft & Fluffy | Immediate eating |
The total time is 6 hours 25 mins, but remember that only 25 minutes of that is you actually working. The rest is just the freezer doing the heavy lifting.
The Pantry List
Gather these items before you turn on the stove. Using chilled cream is the most important part here. If the cream is room temperature, it won't hold the air bubbles, and your ice cream will be flat.
- 2 cups (300g) fresh blackberries Why this? Fresh berries have the best pectin for thickening.
- 1/3 cup (65g) granulated sugar Why this? Helps the berries release their juice.
- 1 tbsp (15ml) lemon juice Why this? Cuts the sweetness and preserves color.
- 1 pinch (1g) salt
- 2 cups (480ml) heavy whipping cream, chilled Why this? High fat content ensures a smooth texture.
- 1 can (14 oz / 397g) sweetened condensed milk Why this? Acts as the stabilizer and sweetener.
- 1 tbsp (15ml) vanilla extract Why this? Adds a floral depth to the cream.
- 1/4 tsp (1.5g) salt
| Original Ingredient | Substitute | Why It Works |
|---|---|---|
| Fresh Blackberries | Frozen Blackberries | Same flavor, but you may need 2 extra mins of simmering |
| Heavy Cream | Full fat Coconut Cream | Similar fat content. Note: Adds a coconut flavor |
| Condensed Milk | Evaporated milk + 1/2 cup powdered sugar | Mimics the thickness, but less stable |
| Vanilla Extract | Vanilla Bean Paste | More intense flavor with visible seeds |
Necessary Kitchen Tools
You don't need a lab, but a few specific tools make this a lot easier. A fine mesh sieve is non negotiable. Blackberry seeds are tiny and hard, and leaving them in ruins the smooth experience of the ice cream.
I recommend using a 9x5 inch loaf pan. It's the right size for this volume of base and allows the swirls to be distinct. A hand mixer or a stand mixer such as KitchenAid works perfectly for the cream. If you're doing it by hand with a whisk, be prepared for a workout.
Finally, have some plastic wrap ready. You'll want to press it directly onto the surface of the ice cream before freezing. This prevents air from hitting the cream, which is how those annoying ice crystals form on top.
Step by step Process
Right then, let's get into the making. This process happens in three distinct phases. We start with the fruit, move to the cream, and finish with the assembly.
Phase 1: Preparing the Berry Reduction
- Combine blackberries, sugar, and lemon juice in a small saucepan over medium heat.
- Simmer for 8-10 minutes, stirring occasionally, until the berries break down and the liquid thickens into a syrupy consistency.
- Press the mixture through a fine mesh sieve into a bowl to remove the seeds.
- Place the syrup in the fridge and let it cool completely. Note: Adding warm syrup to the cream will melt the air bubbles.
Phase 2: Whipping the Vanilla Base
- Pour chilled heavy whipping cream and 1/4 tsp salt into a chilled bowl.
- Beat on medium high speed until stiff peaks form and the cream holds its shape.
- Gently fold in the sweetened condensed milk and vanilla extract using a spatula.
- Mix slowly until the color is uniform and the mixture is smooth. Note: Don't over mix or you'll deflate the air.
Phase 3: The Marble Swirl and Freeze
- Pour half of the vanilla base into a 9x5 inch loaf pan.
- Drizzle half of the cooled blackberry syrup over the top.
- Use a knife to swirl the syrup gently into the cream.
- Repeat with the remaining vanilla base and the rest of the syrup.
- Cover with plastic wrap, pressing it against the surface.
- Freeze for at least 6 hours.
What Actually Makes It Creamy

Since we aren't using a machine to churn air into the mix, we have to use chemistry. This is where the condensed milk does the heavy lifting.
Sugar Concentration: The high sugar content in condensed milk lowers the freezing point of the water. This means the ice cream doesn't freeze into a solid block of ice.
Fat Bubbles: Whipping the cream creates a foam. The fat globules wrap around air bubbles, which stay trapped in the mixture. This creates a silky texture that mimics the results of a professional churner.
| Ingredient | What It Does | Best Swap |
|---|---|---|
| Heavy Cream | Provides structure | Coconut cream |
| Condensed Milk | Stops large ice crystals | Honey + cream (thicker) |
| Lemon Juice | Balances sugar | Apple cider vinegar |
Troubleshooting Common Issues
Even with a simple recipe, things can go sideways. Most problems with Blackberry Vanilla Ice Cream come down to temperature or over mixing.
| Issue | Solution |
|---|---|
| Why Your Ice Cream Is Too Hard | If you find you can't even get a spoon into the container, your fat to sugar ratio might be off. Usually, this happens if the cream wasn't full fat. |
| Why the Cream Grained | If the vanilla base looks curdled or "grainy," you've over beaten the cream. You've essentially started making butter. |
| Why You See Ice Crystals | Ice crystals usually form because air got between the ice cream and the lid. If the plastic wrap wasn't touching the surface, moisture evaporated and then froze into crystals. |
Fun Flavor Twists
Once you've got the hang of this Blackberry Vanilla Ice Cream, you can start playing with the flavors. I love adding a teaspoon of almond extract to the berry reduction. It gives it a "bakery" vibe that pairs beautifully with the vanilla.
For those who want more texture, try adding crushed graham crackers or toasted pecans between the layers. This adds a salty crunch that breaks up the richness. If you're feeling adventurous, you can replace the blackberries with raspberries or blueberries using the same method.
If you enjoy this style of treat, you might also love a Blackberry Swirl Ice Cream recipe which uses a slightly different ripple technique. For something completely different but equally creamy, my Cheese and Toasted Pecans recipe is a great side dish for a summer brunch.
Adjusting the Batch Size
Making a smaller or larger amount requires a few tweaks to make sure the texture stays the same.
Scaling Down (Half Batch): Use a smaller container, like a 4x6 inch glass dish. Since there's less mass, it might freeze slightly faster, but I still recommend waiting at least 6 hours. If you're using a single egg for any variation, beat it first and then measure out half.
Scaling Up (Double Batch): Don't just double the salt and vanilla. Increase those to about 1.5x the original amount to avoid an overpowering taste. Work in batches when whipping the cream, as most home mixers can't handle 4 cups of heavy cream without splashing everywhere.
Baking Adjustments: If you're using this ice cream as a filling for a cake, lower your oven temperature by 25°F for the cake layers. This prevents the cake from drying out while you wait for the ice cream to set.
Common Kitchen Myths
Searing fruit "locks in the flavor." This is a common misconception. Simmering berries is about reducing water and concentrating sugars. The flavor is there regardless, but the reduction makes the syrup thick enough to stay in a swirl rather than sinking to the bottom.
You need to use a specialized "ice cream salt" for the freezer. This only applies to old school salt and ice churners. Since we are using a modern freezer, you just need the ingredients in the bowl. The salt in the recipe is for flavor, not for lowering the freezing point of the freezer itself.
Storage and Freshness Tips
Store your Blackberry Vanilla Ice Cream in an airtight container in the back of the freezer, away from the door. The temperature fluctuates every time you open the door, which can lead to melting and re freezing. This creates a grainy texture.
It stays fresh for about 2 weeks. After that, the flavor starts to fade, and the risk of freezer burn increases. If you see frost forming on the edges, just scrape it off with a knife before serving.
Zero Waste Tip: Don't throw away the berry seeds from the sieve. If you're into gardening, they are great for composting. Alternatively, if you have leftover berry syrup, stir it into some Greek yogurt or drizzle it over pancakes for breakfast.
Serving Suggestions
Depending on who you're serving, you can change how you present this. Here are three ways to do it.
| Level | Presentation | Key Tweak |
|---|---|---|
| Simple | Standard bowl and spoon | Add one fresh blackberry on top |
| Polished | Glass coupe or martini glass | Garnish with a mint leaf and a berry drizzle |
| Restaurant | Quenelle shape on a plate | Serve with a side of warm brownie and a mint sprig |
For a really polished look, use two warm spoons to scoop the ice cream. Press the spoons together to create a smooth, oval shape called a quenelle. It takes a little practice, but it makes the dessert look like it cost $15 at a bistro.
Recipe FAQs
What is the best fruit to make into ice cream?
Blackberries are an ideal choice. Their natural tartness perfectly balances the richness of the sweetened condensed milk and vanilla.
How to prevent ice crystals from forming on top?
Press plastic wrap directly onto the surface of the mixture before freezing. This eliminates the air gap where condensation typically forms into frost.
Is it true that whipping the cream longer always makes the ice cream fluffier?
No, this is a common misconception. Over beating the cream can cause it to grain or turn into butter, which ruins the smooth texture of the vanilla base.
Can I use frozen blackberries instead of fresh?
Fresh berries are strongly recommended. Frozen fruit often releases excess moisture, which can thin the syrup and prevent the swirls from holding their shape.
How to achieve the perfect swirl pattern?
Drizzle cooled syrup over half of the vanilla base and use a knife to gently swirl it before adding the remaining cream and second syrup layer.
How long does the ice cream need to freeze?
Freeze for at least 6 hours. This ensures the base is fully set and the blackberry syrup is stabilized for clean scooping.
What other rich desserts can I make with similar ingredients?
Custards are an excellent alternative. If you enjoyed mastering the cream peaks here, see how a different rich base works in our classic creme brulee.
Blackberry Vanilla Ice Cream