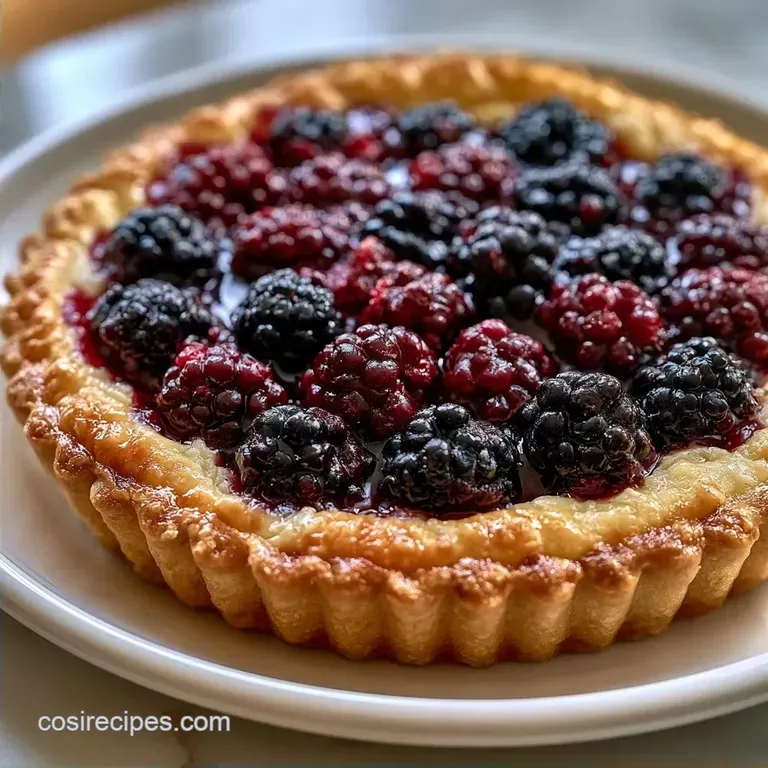
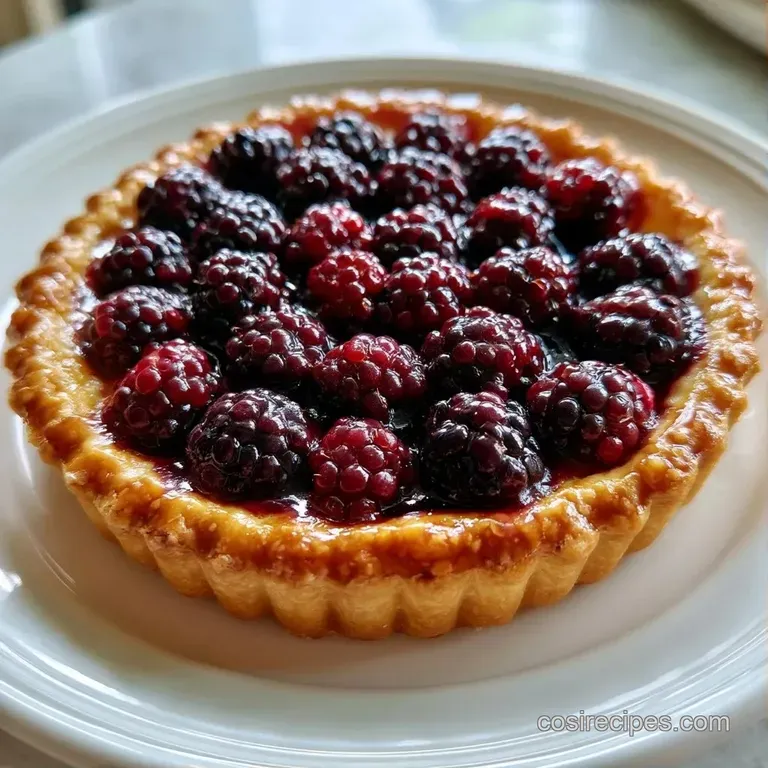
Homemade Blackberry Tart: Buttery and Crisp
- Time: 20 min active + 1 hr 15 mins baking/chilling
- Flavor/Texture Hook: Buttery, crisp crust with a glossy, jammy center
- Perfect for: Summer dinner parties or a cozy Sunday treat
The smell of bubbling berries and browned butter always takes me back to my grandmother's kitchen. She used to make a rustic version of this, but the bottom always ended up a bit damp. I spent a few summers trying to figure out why my berries were leaking into the dough.
I eventually realized that tossing raw berries with sugar creates a syrup that sinks right into the flour. By simmering the fruit first, the filling sets up. This means you get a clean slice every time.
You can expect a dessert that looks like it came from a bakery but doesn't require a degree in pastry. My favorite Blackberry Tart delivers a sharp, bright fruit flavor that cuts right through the rich, salty crust.
How to Make a Blackberry Tart
The way we handle the butter and berries makes this recipe work. Most people just throw everything in a pan, but a few specific moves change the outcome.
Cold Butter: Keeping the fats chilled creates tiny pockets of steam. This makes the crust flaky instead of tough.
Pre cooked Filling: Simmering the berries thickens the pectin. This prevents the juice from soaking the bottom of your Blackberry Tart.
Chill Time: Resting the dough in the pan stops it from shrinking. It locks the shape in place before it hits the heat.
| Method | Time | Texture | Best For |
|---|---|---|---|
| Pre cooked filling | 95 min | Set, clean slices | Dinner parties |
| Raw berry toss | 60 min | Jammy, loose | Casual brunch |
Right then, let's look at what actually goes into the dough and the filling.
What Goes Into the Dish
I've found that using powdered sugar in the crust gives it a more tender crumb than granulated sugar. For the fruit, stick to fresh berries if you can. If you're struggling with the dough, King Arthur Baking has some great tips on keeping your workspace cool.
| Ingredient | What It Does | Best Swap |
|---|---|---|
| All purpose flour | Provides structure | Spelt flour (slightly nuttier) |
| Unsalted butter | Creates flakiness | Cold coconut oil (dairy-free) |
| Cornstarch | Thickens the juices | Arrowroot powder (clearer look) |
| Apricot preserves | Adds a high gloss shine | Peach jam (similar flavor) |
The Dough Components
- 1.5 cups (190g) all purpose flour Why this? Standard protein level for a sturdy crust
- 0.5 cup (115g) unsalted butter, chilled and cubed Why this? Cold fat equals flaky layers
- 0.25 cup (50g) powdered sugar Why this? Creates a softer, finer texture
- 0.25 tsp (1.5g) salt Why this? Balances the sweetness of the berries
- 4 tbsp (60ml) ice cold water Why this? Binds dough without melting butter
The Berry Filling
- 4 cups (600g) fresh blackberries Why this? Fresh berries have a brighter pop
- 0.5 cup (100g) granulated sugar Why this? Melts easily to create a syrup
- 2 tbsp (16g) cornstarch Why this? Prevents the filling from running
- 1 tbsp (15ml) lemon juice Why this? Brightens the fruit flavor
- 1 tsp (2g) lemon zest Why this? Adds aromatic citrus notes
- 0.25 tsp (1.2g) ground cinnamon Why this? Adds a subtle, warm depth
The Finishing Touch
- 2 tbsp (30ml) apricot preserves Why this? Traditional glaze for fruit tarts
- 1 tbsp (15ml) water Why this? Thins the glaze for brushing
Tools You Will Need
You don't need a professional kitchen, but a few tools make the Blackberry Tart much easier. A tart pan with a removable bottom is my top recommendation. It saves you from the heartbreak of the crust breaking when you try to lift it out.
I usually use a fork or a pastry cutter for the butter. If you have a food processor, you can pulse the flour and butter, but be careful not to overwork it. Overmixing develops too much gluten, which turns a tender crust into a hard cracker.
A medium saucepan is needed for the berries. You want enough room for the berries to break down without splashing all over the stove. A silicone spatula helps you stir the fruit gently so you don't mash them into a paste.
From Prep to Plate
Let's get into it. Follow these steps to get that professional result at home.
Phase 1: Building the Base
- Combine flour, powdered sugar, and salt in a bowl. Cut in the chilled butter using a fork or pastry cutter until the mixture resembles coarse crumbs.
- Stir in ice water one tablespoon at a time. Mix until the dough just holds together when you pinch it. Note: Do not overmix or the crust will be tough
- Press the dough firmly into the bottom and up the sides of a 9 inch tart pan. Chill in the fridge for 15 minutes.
Phase 2: Preparing the Berry Filling
- Combine blackberries, granulated sugar, cornstarch, lemon juice, zest, and cinnamon in a saucepan over medium heat.
- Stir gently until berries break down and the sauce thickens into a glossy consistency. Remove from heat and cool slightly. Note: This step is what saves your Blackberry Tart from sogginess
Phase 3: The Bake and Finish
- Preheat oven to 375°F (190°C). Pour the blackberry filling into the chilled crust and smooth the top with a spatula.
- Bake for 30-35 minutes until the crust edges are deep golden brown and the filling is bubbling.
- Allow the Blackberry Tart to cool for 20 minutes.
- Warm apricot preserves with water and gently brush over the top for a professional shine.
Chef's Note: If you want a really crisp edge, wrap a strip of foil around the sides of the pan if the crust starts browning too quickly before the center is set.
Troubleshooting Your Bake
Even when you follow the steps, baking can be moody. Most issues with a Blackberry Tart come down to temperature or moisture.
| Issue | Solution |
|---|---|
| Why Your Crust Shrinks | If the dough pulls away from the edges, it's usually because the gluten was stretched too much or it didn't chill long enough. This creates tension that releases in the oven. |
| Why the Filling is Too Runny | This happens if the berries were frozen and released too much water, or if the cornstarch didn't reach a boil. You need that bubble to activate the thickening power. |
| Why the Bottom is Soggy | Usually, this is because the filling was poured in while boiling hot, or the berries weren't cooked down enough. Let the filling cool for a few minutes before adding it to the dough. |
Different Ways to Twist it
Once you've got the basic Blackberry Tart down, you can start playing with the flavors. I love adding a bit of almond extract to the crust for a nutty undertone. It pairs beautifully with the tartness of the fruit.
For those who want something smaller, you can make mini Blackberry Tarts. Just roll out the dough and press it into muffin tins. Reduce the bake time to about 15-20 minutes. These are great for parties and feel a bit more elegant.
If you're looking for a different texture, try a Blackberry Tart Puff Pastry version. Swap the homemade dough for a sheet of frozen puff pastry. It's a quick shortcut that gives you a light, airy lift. For other fruit based treats, my Blackberry Pie Bars are a great alternative if you prefer a square slice.
You could also try an Old Fashioned Blackberry Tart style by adding a sprinkle of cinnamon sugar on the crust edges before baking. This creates a caramelized rim that tastes like a churro. For a dairy-free twist, use chilled coconut oil in the crust, though it will be slightly more crumbly.
Adjusting the Recipe Size
If you're just baking for two, you can halve the Blackberry Tart recipe. Use a 5 inch tart pan or a small pie dish. Reduce the baking time by about 20%, but keep an eye on the edges. Since you can't easily halve an egg (if you ever add one to a variation), just beat one egg in a bowl and use half of the liquid.
Scaling up to a 2x batch is a bit trickier. I recommend working in batches for the dough so you don't overwork it in a giant bowl. When doubling the Blackberry Tart, don't double the salt or cinnamon exactly - use about 1.5x instead. Spices can become overpowering when scaled linearly.
For the bake, if you're using two pans in the oven, lower the temperature to 350°F (175°C) and extend the time by 5-10 minutes. This ensures the heat circulates evenly around both tarts.
- If you want a clean slice, pre cook the berries.
- If you want a rustic look, skip the apricot glaze.
- If you're in a rush, use store-bought chilled pastry.
Truths About Fruit Baking
There are a few things people tell you about baking that just aren't true. Let's clear them up so you can bake your Blackberry Tart with confidence.
One common myth is that you must "blind bake" every tart crust. While it helps with some fillings, pre cooking the berries in this recipe removes the need for it. The filling is thick enough that the crust cooks perfectly fine alongside the fruit.
Another misconception is that using only "ice cold" ingredients is a suggestion. It's actually the most important part. If the butter melts before it hits the oven, you lose the flakiness, and your Blackberry Tart will taste more like a cookie than a pastry.
Saving and Storing Leftovers
Your Blackberry Tart stays fresh in the fridge for up to 4 days. Keep it covered with a loose piece of foil or a cake dome. Avoid airtight plastic wrap touching the top, or you'll ruin that glossy apricot glaze.
If you want to freeze it, let the tart cool completely. Wrap it tightly in plastic wrap and then a layer of aluminum foil. It'll last about 2 months in the freezer. To eat it, let it thaw in the fridge overnight, then pop it in a 300°F (150°C) oven for 10 minutes to refresh the crust.
For zero waste, don't toss the berry stems or any leftover fruit. I usually throw leftover blackberries into a smoothie or simmer them down with a bit of honey to make a quick syrup for pancakes. Even the leftover apricot glaze can be used to brush over a homemade loaf of bread.
How to Serve It
The way you plate a Blackberry Tart can change the whole vibe of the meal. I usually choose my plating based on who is coming over.
| Level | Approach | Key Tweak |
|---|---|---|
| Simple | Sliced & Plated | Serve warm with a fork |
| Polished | The Classic | Dust with powdered sugar and a mint leaf |
| Restaurant | Deconstructed | Side dollop of cream and berry coulis |
For a classic pairing, a scoop of high-quality vanilla bean ice cream is the way to go. The cold cream melts into the warm berries, creating a rich sauce. If you want something lighter, pair it with some Blackberry Fool for a double berry experience.
Another refreshing twist is adding a dollop of Greek yogurt or crème fraîche. The tanginess of the dairy balances the sweetness of the apricot glaze. If you're serving this for brunch, a drizzle of honey and a few fresh mint leaves make it feel like a fancy cafe treat.
Right then, that's everything you need for a stunning Blackberry Tart. It's all about the temperature of the butter and the patience to simmer those berries. Once you see that deep golden crust and the bubbling purple center, you'll see why this is my favorite way to use summer fruit.
Trust me on the chill time - it makes all the difference. Enjoy your Blackberry Tart!
Recipe FAQs
How to prepare blackberries for a tart?
Combine berries, sugar, cornstarch, lemon juice, zest, and cinnamon in a saucepan. Stir over medium heat until the berries break down and the sauce thickens into a glossy consistency.
What do I do with fresh picked blackberries?
Use them immediately for a fresh tart or freeze them for later. If you have a surplus, these berries also work beautifully in an easy cobbler.
Why did my tart crust shrink during baking?
The dough likely wasn't chilled long enough or the gluten was overstretched. Chilling the crust for 15 minutes before baking helps release tension and prevents the edges from pulling away.
Why is my blackberry filling too runny?
The cornstarch likely didn't reach a full boil. You must see the filling bubble to activate the thickening power of the cornstarch.
How to get a professional shine on the tart?
Brush warm apricot preserves mixed with water over the cooled surface. This creates a glossy, bakery style finish.
Is it true that frozen berries are better than fresh for tarts?
No, this is a common misconception. Frozen berries release significantly more moisture, which often results in a runny filling and a soggy crust.
How to ensure the crust remains flaky?
Cut chilled butter into the flour until the mixture resembles coarse crumbs. This keeps the butter in small pieces, which creates steam and flakes during the baking process.
Fresh Blackberry Tart

